In this article, we will show you how to configure your Plex Media Server for the first time. For more about installation, and further configuration check our latest guide on How to set up Plex Media Server.
When you order your Seedbox and finalize the transaction, you need to log in to your Client Area and click on “My Services”. From there, find the URL to access Plex.
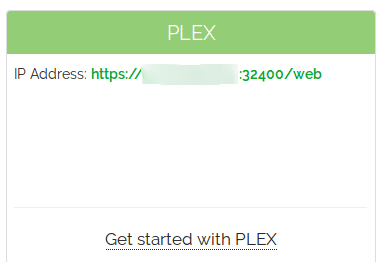
Credentials and links for all services can be found in the email you’ve received after your order. If you try to access that link without configuring your Media Server first Plex will not be able to find your server, so you will be stuck on this page:
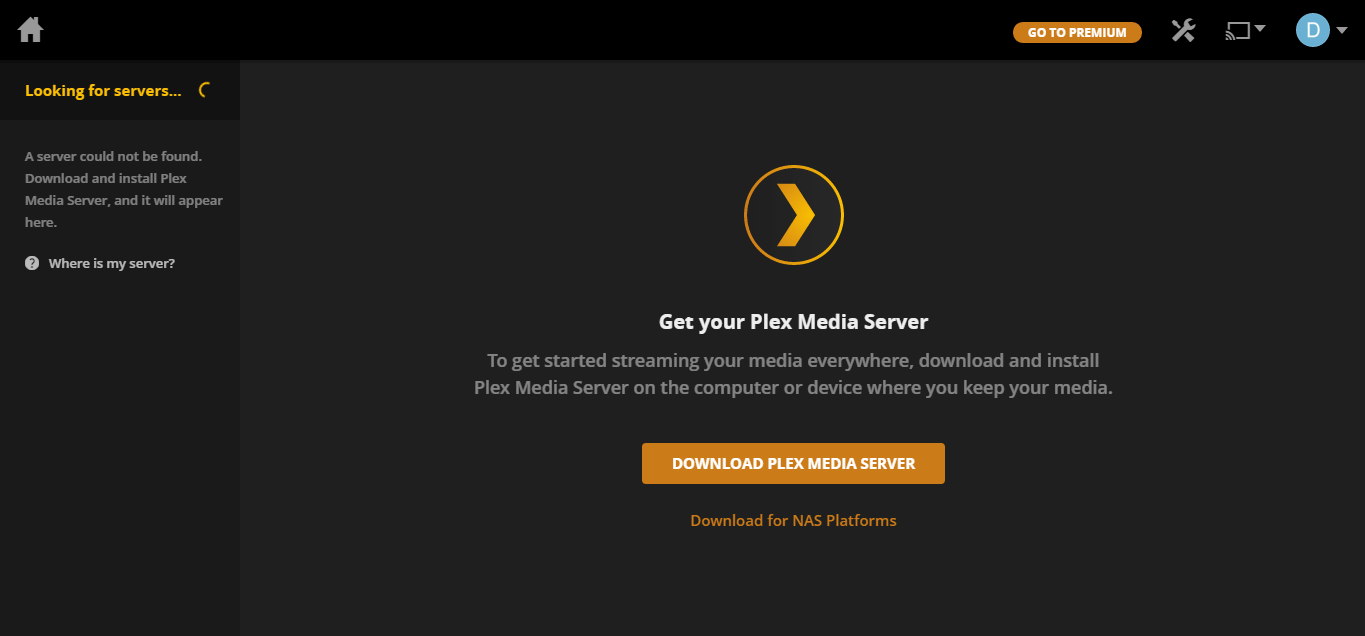
Photo by the official website
So to prevent this from happening, configure your Plex as follows:
Step 1
Connect to your Remote Desktop via X2G0.
You will receive your Remote Desktop credentials in the same email as Plex credentials.
If you do not know how to do it here are some articles from our help section that will guide you through that process step by step:
How to log in to your Seedbox Remote Desktop on Windows and MacOSx (using X2Go)
Step 2
When you are connected to your Remote Desktop go to your web browser ( Mozilla in our case ).
Browse to the following URL right from within your remote desktop Brower: http://localhost:32400/web
It should look as follows:
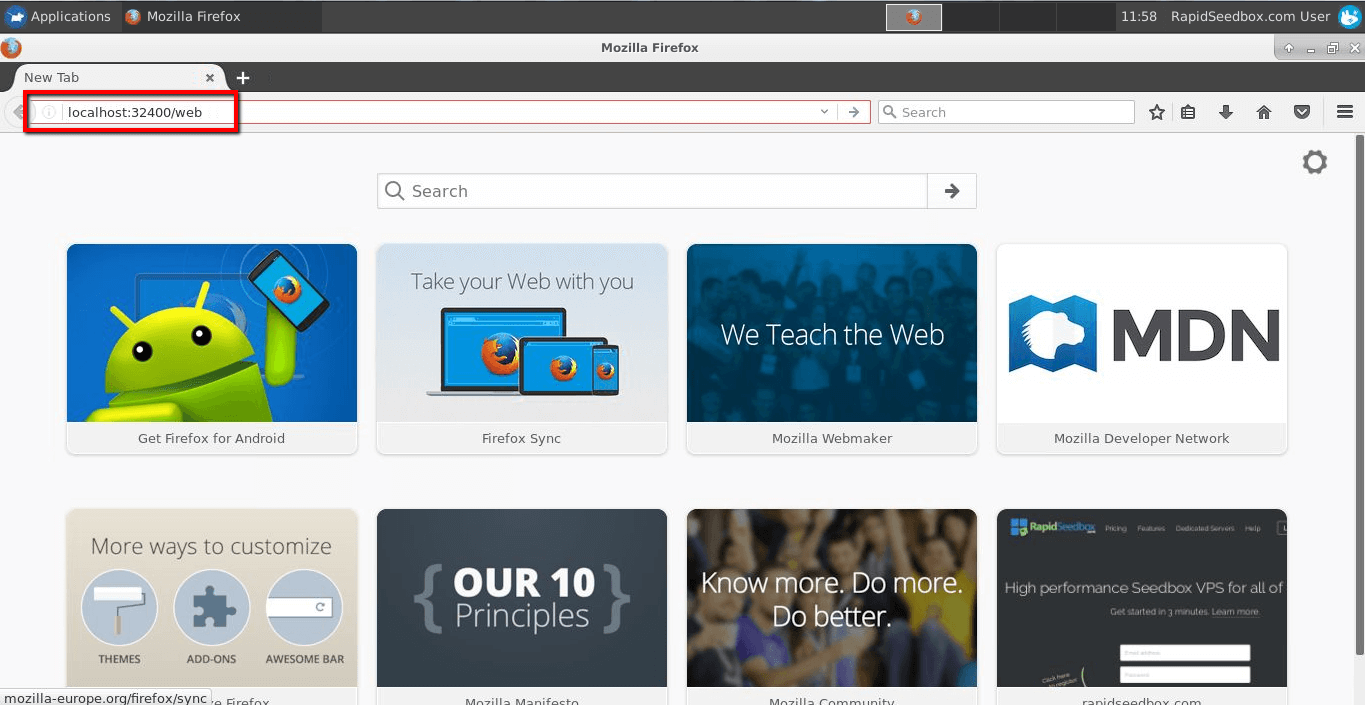
Photo by Mozilla Firefox
Now hit Enter and Plex should load without problems.
Step 3
If you completed the previous step you will now see this page:
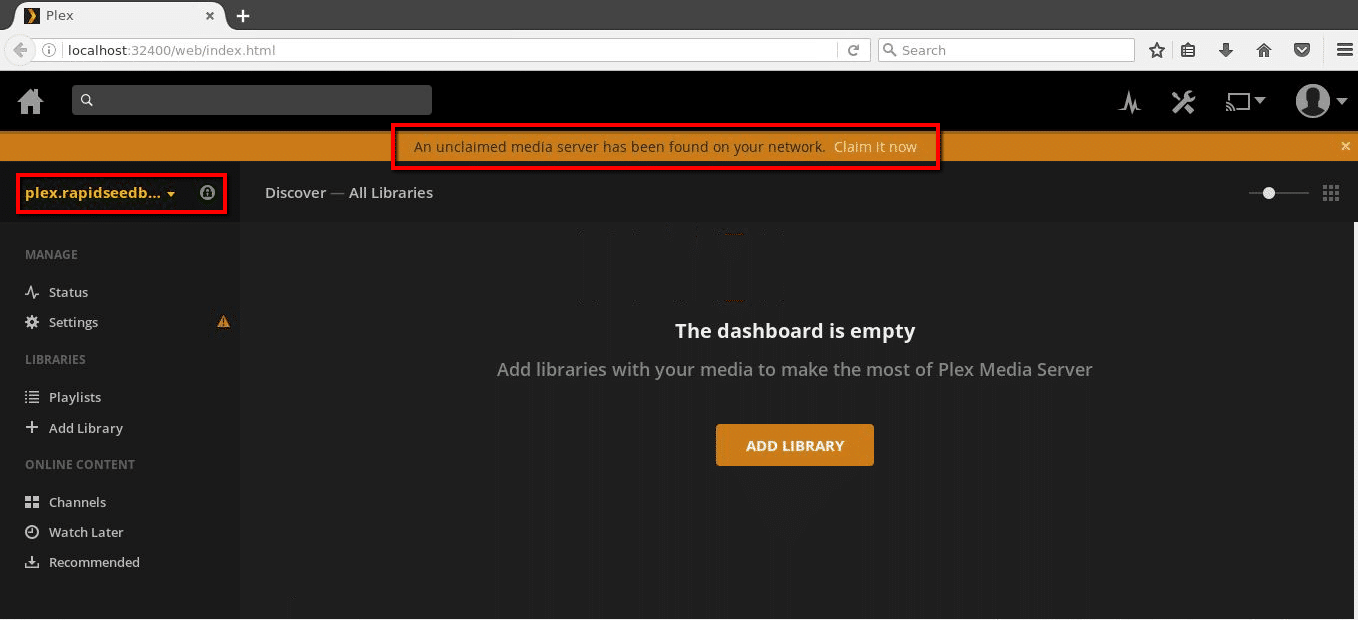
Photo by plex.tv
Now you can see that in the right corner, you have access to Plex Media Server on your Seedbox, but in the top, you can also see that you must “Claim” your server.
That means to synchronize your Plex Media Server with your Seedbox IP, and by doing that declare this Plex Server as your own.
Then, click on “Claim it now” in the top of the page, and you will be transferred to a new page.
Step 4
If you completed the step 3, you will be transferred to Settings page:
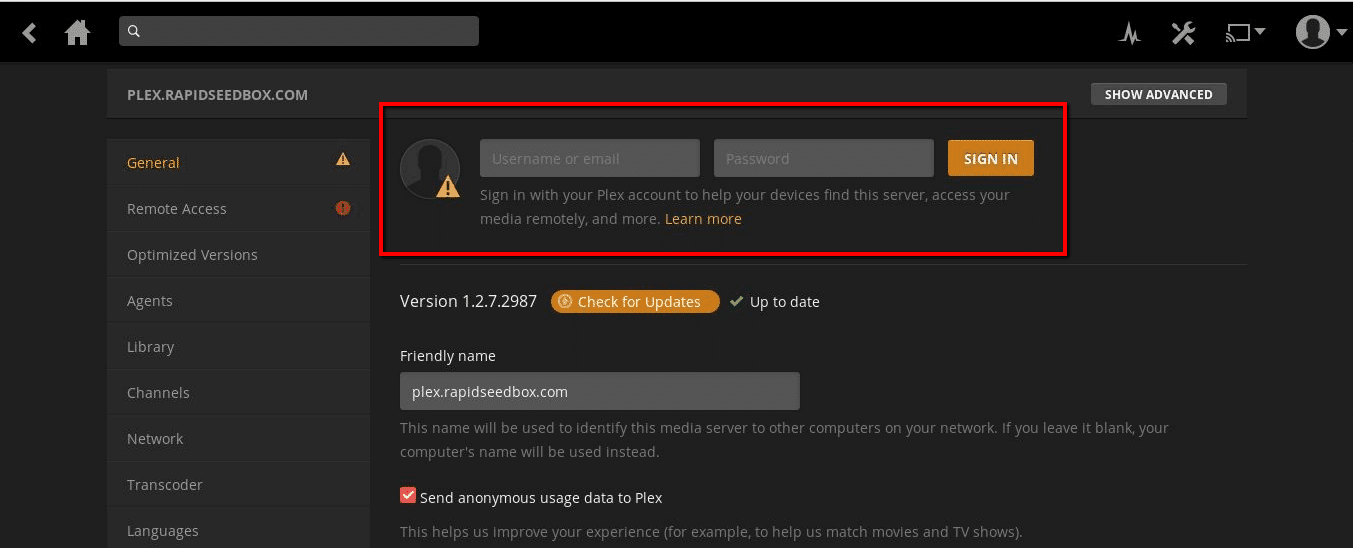
Photo by the official website
To “Claim” your server you now must sign in with your Plex account credentials.
Those are the credentials of your account that you created on Plex’s official website.
If you don’t have an account, first of all, click here to create one.
If you complete this step your Plex Media Server will now be synchronized with your Plex account, therefore your server will be “Claimed” by it:
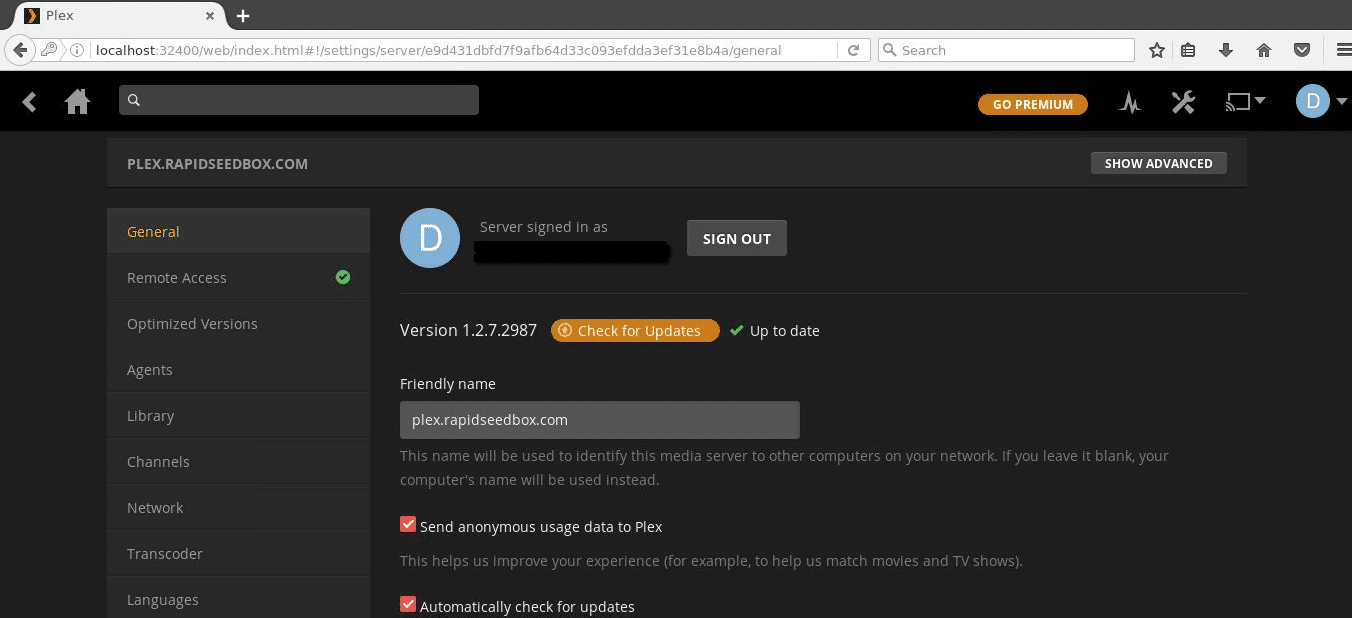
Photo by the official website
Step 5
When you complete all the steps above you are finished with configuring your Plex Media Server for daily use, and now you can use the link from your credentials email ( xxxx.xxxx.xxxx.xxxx:32400/web ) to access it remotely without the use of Remote Desktop.
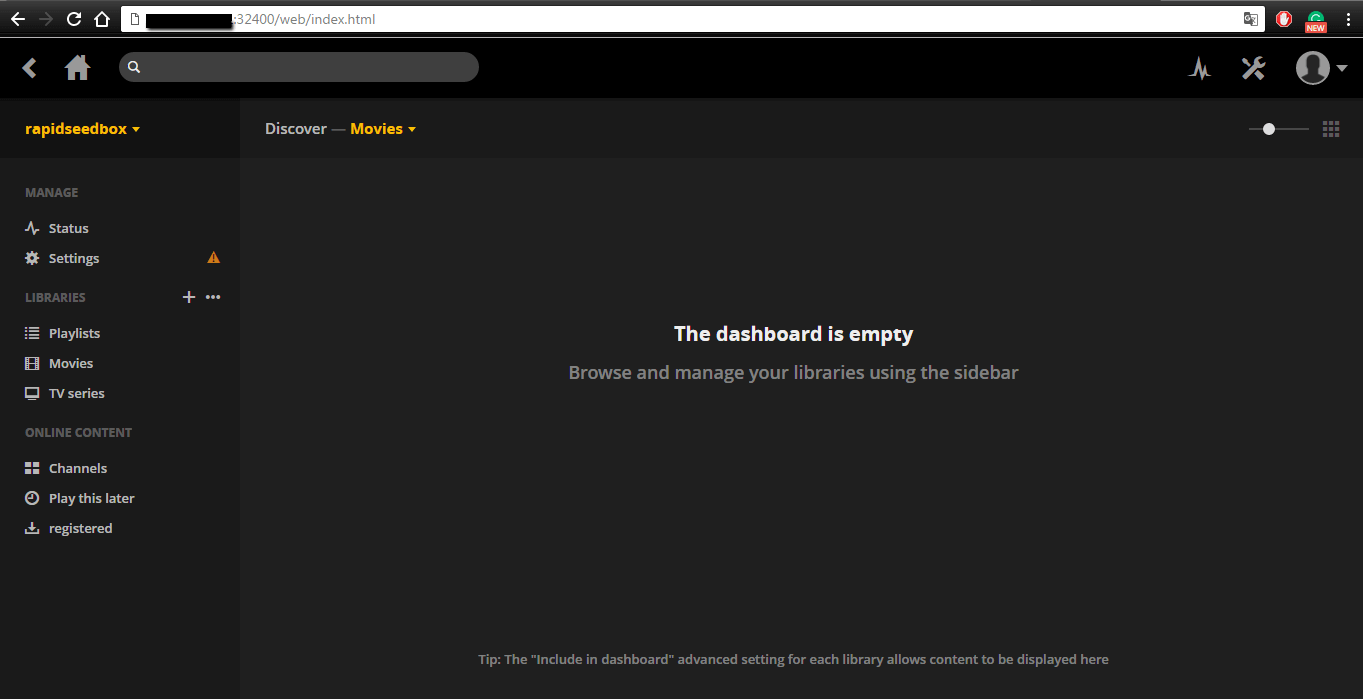
Photo by plex.tv
Step 6
Before you go any further, it is highly recommended to update your Plex Media Server instance once you have it installed and claimed.
- Log in to your User Panel, Locate the One-Click Installer list, select Installed, and hit the Refresh button.
- If there is an available update for the Media Server, you will see an arrow-up icon in its row, so simply click on it.
- This will do the Plex Media Server update to the latest one supported by Ubuntu developers. (it might not be the latest one provided by Plex.tv).
- Once the update process finishes, issue a reboot command to the seedbox to apply the updates.
The next step would be adding your libraries, and you can see how to do that below:
How to add Plex Libraries and synchronize your seedbox content
We reached the end, therefore Happy streaming!
Disclaimer: This material has been developed strictly for informational purposes. It does not constitute endorsement of any activities (including illegal activities), products or services. You are solely responsible for complying with the applicable laws, including intellectual property laws, when using our services or relying on any information herein. We do not accept any liability for damage arising from the use of our services or information contained herein in any manner whatsoever, except where explicitly required by law.