Nginx Proxy Manager (NPM) is an open-source and free application designed to simplify the management of Nginx’s proxy, SSL, Access Lists, and more. It is built with a user-friendly dashboard that aims to help those users who aren’t exactly Nginx CLI experts. Plus, it also provides free SSL via Let’s Encrypt, Docker integration, and support for multiple users.
In this complete guide, we aim to provide an introduction to Nginx Proxy Manager. We will go through the basics of what is NPM, how it works, its features, and more.
The article also compares NPM with native NGINX configurations, details the installation process on Docker, and guides through the UI and initial setup, concluding with an FAQ section to address common queries.

Disclaimer: This material has been developed strictly for informational purposes. It does not constitute endorsement of any activities (including illegal activities), products or services. You are solely responsible for complying with the applicable laws, including intellectual property laws, when using our services or relying on any information herein. We do not accept any liability for damage arising from the use of our services or information contained herein in any manner whatsoever, except where explicitly required by law.
Table of Contents
- What is Nginx Proxy Manager?
- NPM versus native NGINX configurations
- How to install Nginx Proxy Manager?
- How to use the Nginx Proxy Manager UI and configure it?
- Vital Configurations and Initial Setup
- Nginx Proxy Manager FAQ
- Final Words
📘 Think you know NGINX? Think again.
Most configs miss these key directives: Download the 47-Directive Blueprint1. What is Nginx Proxy Manager?
Nginx Proxy Manager (NPM) is a powerful (open source project under the MIT license) tool created to simplify the management of Nginx’s proxy, SSL, and other capabilities. It is designed with the idea of users who may not be well-versed in Nginx’s intricacies.
The tool allows users to easily expose web services within their network (or computer). In other words, it provides a secure and efficient gateway for internet traffic. Likewise, its integration with Let’s Encrypt enables users to secure their services with free SSL certificates.
Key features:
- Beautiful UI: Based on Tabler, the interface is intuitive and user-friendly.
- Free SSL: The built-in support for Let’s Encrypt allows users to secure their web services at no extra cost.
- Docker Integration: Nginx Proxy Manager is built as a Docker image. This simplifies deployment and only requires a database to function.
- Multiple Users: It supports configuring additional users with varying levels of access.
Who is the Nginx Proxy Manager recommended for and what are its use cases?
Nginx Proxy Manager is designed with security in mind, making it an ideal choice for home networks or small businesses looking to expose their services to the wider internet. Additionally, its approachable design makes it accessible to users of all skill levels, providing a robust solution for managing reverse proxies, SSL termination, and more. So, Nginx Proxy Manager is useful for those hosting a web application at home or managing services for a small business. It is easier than ever to leverage the full capabilities of Nginx.
Software and Project Details:
- Documentation: Nginx Proxy Manager’s documentation is quite thorough. It details the entire setup, configuration, and operational guidance. Look for a README file for the official detailed documentation.
- MIT License. This is a permissive free software license that allows individuals and organizations to use, copy, modify, merge, publish, distribute, sublicense, and sell the software and its associated documentation freely.
- Popularity: The project has over 2.2k forks and more than 19.2k stars. The number of stars and forks on GitHub indicates the community’s interest and engagement with this project.
- Activeness and responsiveness: Checking the issues (1.3k) and pull requests (59) tabs on GitHub, it looks like this project is steadily active and its maintainers are indeed responsive.
- Compatibility: You can install the Nginx Proxy Manager software on any system that supports Docker (as it’s distributed as a pre-built Docker image). This makes it suitable for a variety of environments.
What is not Nginx Proxy Manager?
Nginx Proxy Manager (NPM) is not directly associated with NGINX, Inc., the company behind the Nginx web server. In addition, it is not a web server, a Content Delivery Network (CDN), a Web Application Firewall (WAF), a standalone SSL/TLS certificate authority, or a complete hosting solution. And most importantly, NPM is not a proxy server provider; it does not provide proxy servers. You’ll need a proxy provider to use and manage with NPM.
2. Nginx Proxy Manager (NPM) versus native NGINX configurations
As said in the previous section, NGINX (or nginx) is a versatile open-source software that serves as a web server. It can also work as a reverse proxy to balance traffic across servers. Plus, it can also be configured as a mail proxy and an HTTP cache.
Natively, you can use NGINX itself to configure and manage NGINX proxy servers, so why would you need the NGINX Proxy Manager (NPM)?
Please, take a look at the following comparison table. It summarizes the advantages and challenges associated with each option.
Nginx Proxy Manager (NPM) vs native NGINX comparison
| Aspect | Nginx Proxy Manager (NPM) | Native NGINX |
| User Interface | Friendly GUI for easy setup | Command-line interface; steeper learning curve |
| Configuration | Simplifies reverse proxy and SSL configurations | Highly customizable and detailed configurations |
| Learning Opportunity | Can inhibit learning NGINX’s nuances | Offers deep understanding of web server configurations |
| Bulk Changes | GUI is not efficient for bulk changes; may result in errors | Bulk changes via config files are efficient and reliable |
| Updates | Less frequent updates; potential security risks | Regular updates; more secure |
| Flexibility | May lack advanced configuration options | Full feature access for complex setups |
| Service Failure Handling | A single error can cause the entire service to fail | Can isolate and manage individual service failures |
| Longevity | Development reliant on a single programmer; risks in long-term support | Widely supported by a large community |
| SSL Management | Automated SSL setup and management | Manual setup; more control over SSL configurations |
| Overhead | GUI adds an additional layer of management | Direct interaction with configuration files |
| Scalability | May not suit complex, scalable environments | Better suited for scalable, enterprise-level configurations |
| Infrastructure-as-Code | Less suited due to web-based management | Ideal for infrastructure-as-code practices |
| Community and Support | Smaller, dependent on the availability of the developer | Large community with extensive support and documentation |
Note: The choice between NPM and native NGINX ultimately depends on your specific needs, skills, and the complexity of the server setup that you are managing. However, looking at the comparison table can help you get an idea of which way to go. In addition, when it comes to SSL management we recommend using SSL & TLS Certificate Software.
3. How to install Nginx Proxy Manager?
For demonstration purposes, we will install the Nginx Proxy Manager on a Docker Container via Docker Desktop (and Docker Compose).
To install Nginx Proxy Manager on your Windows machine using Docker Compose, follow these step-by-step instructions:
a. Requirements.
- Docker and Docker Compose: Ensure Docker and Docker Compose are installed on your Windows machine. If not, you can download Docker Desktop for Windows, which includes Docker Compose, from the official Docker website.
- Docker-Compose is used for defining and running multi-container Docker applications. With a YAML file, you can configure your application’s services and create and start all the services from your configuration.
- After installation, ensure the Docker is running by checking its icon in the system tray.
- You can also check the versions to ensure they are both installed. Run “docker –version” to ensure Docker is installed and working. Run “docker-compose –version” to check if Docker Compose is installed.
- Ports: Ensure that ports 80, 81, and 443 are available on your system as these are required for the Nginx Proxy Manager to work. Port 80 is used for HTTP, port 443 for HTTPS, and port 81 for accessing the admin interface.
- Volumes: You’ll need to map volumes for data persistence. Specifically, you should map a local directory to /data and /etc/letsencrypt inside the container to ensure that your configurations and SSL certificates are retained across container restarts. This is key when you are updating the Docker image.
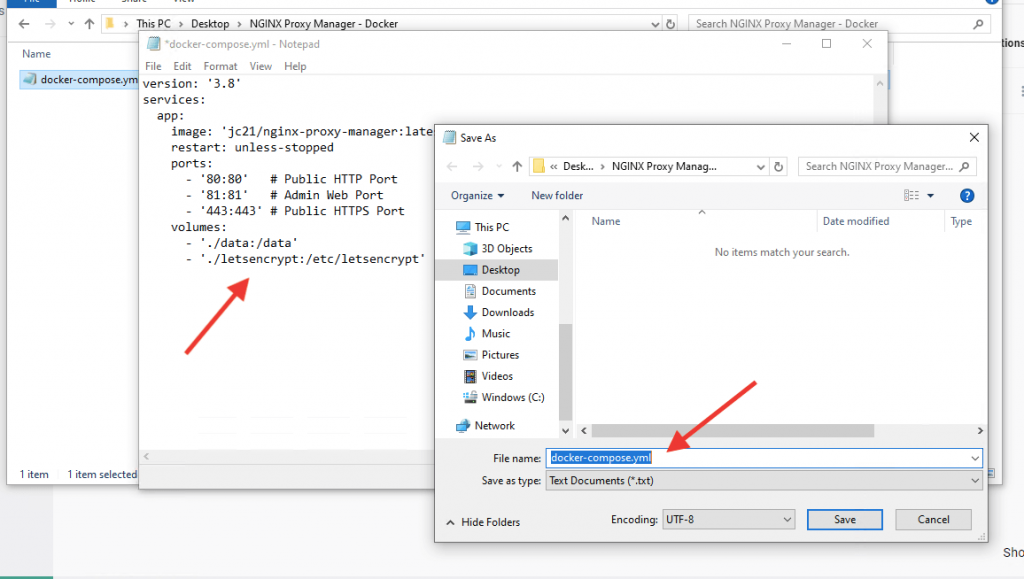
b. Create a Docker Compose File
- Open your preferred text editor and create a file named docker-compose.yml. Or if the file is already created, just open it and add the following lines to the file.
- Paste the following content into the file (Make sure spacing and indentation are correct to keep up with YAML formatting):
| version: ‘3.8’ services: app: image: ‘jc21/nginx-proxy-manager:latest’ restart: unless-stopped ports: – ’80:80′ # Public HTTP Port – ’81:81′ # Admin Web Port – ‘443:443’ # Public HTTPS Port volumes: – ./data:/data – ./letsencrypt:/etc/letsencrypt |
- Save the file in a dedicated folder. This folder will also hold your data and configuration files.
c. Start Nginx Proxy Manager
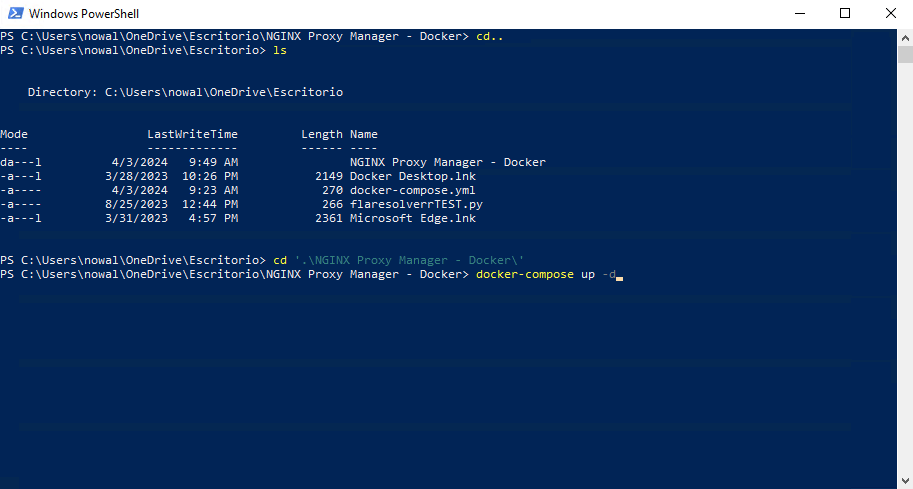
- Open a command prompt or PowerShell window. Navigate to the directory where you saved your docker-compose.yml file using the cd command. If you are having problems with the Docker Compose file, we recommend trying an online YAML validator like YAMLint to check for formatting errors.
- Run the following command to start the software:
|
1 |
docker-compose up -d |
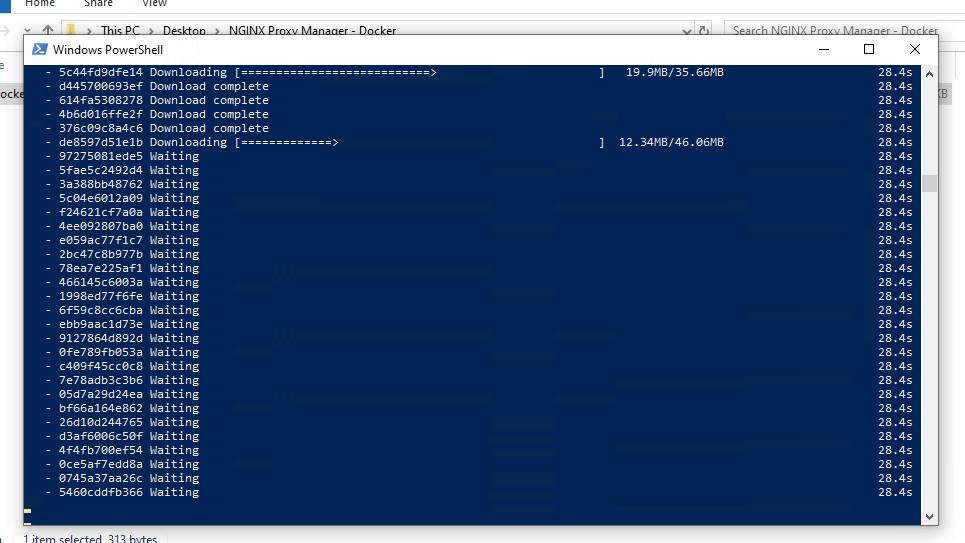
- Docker will start downloading the necessary images and start the Nginx Proxy Manager container.
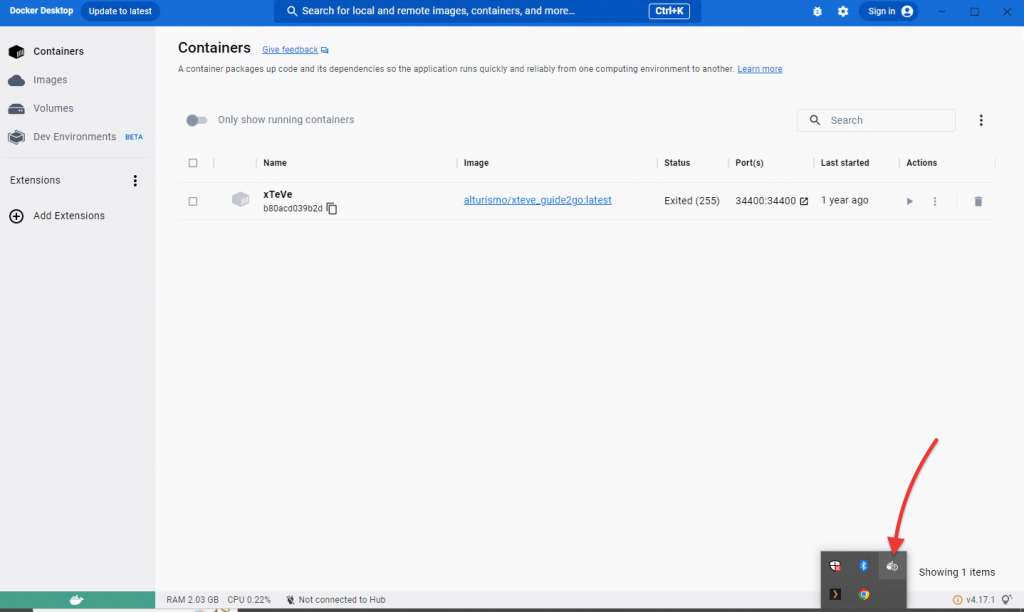
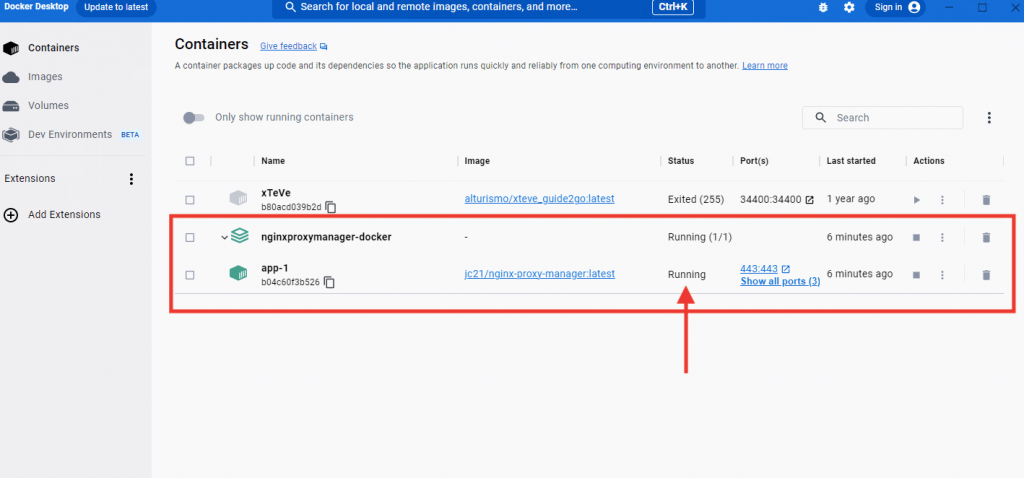
- Now, you can go back to Docker Desktop and ensure your new Nginx Proxy Manager Docker container is up and running.
🔍 Debug less, deploy smarter with this quick NGINX list >> Download the Cheat Sheet
d. Access the Nginx Proxy Manager Interface
- Once the Nginx Proxy Manager container is running, open a web browser and go to http://localhost:81. You should now see the login page.
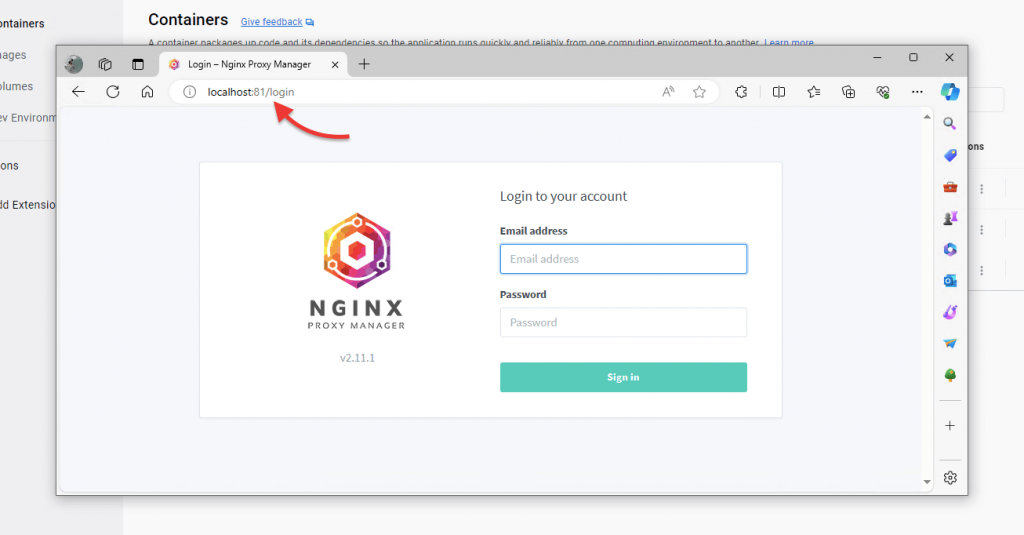
e. Log in to Nginx Proxy Manager
- Use the default login credentials to access the admin interface:
- Email: [email protected]
- Password: changeme
- After logging in, you’ll be immediately prompted to change the default password.
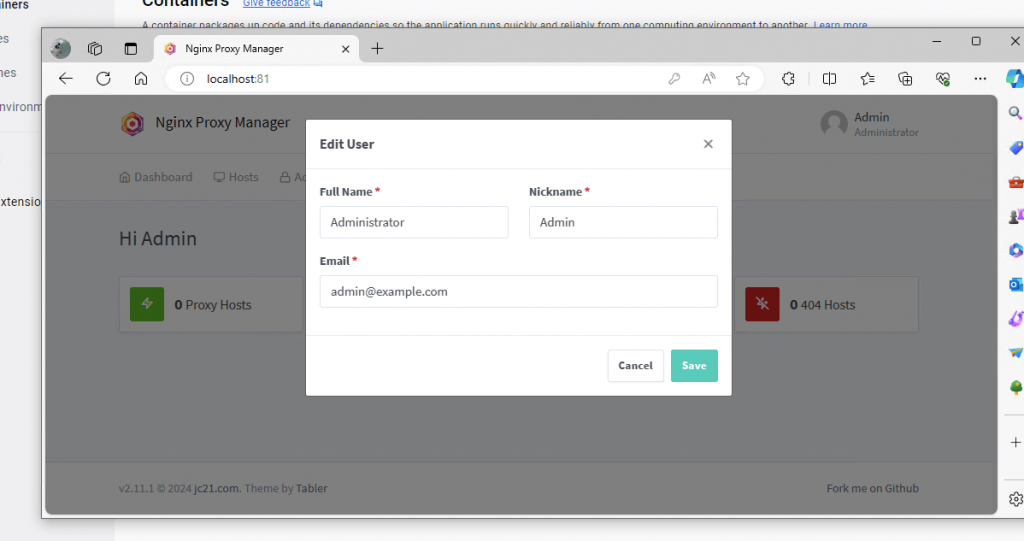
- After you successfully change login and credentials you can start configuring your proxy hosts, SSL certificates, and other settings according to your needs.
f. Maintain Your Installation
- Keep your Nginx Proxy Manager up to date by periodically stopping your container, pulling the latest image, and restarting your stack:
|
1 2 3 |
docker-compose down docker-compose pull docker-compose up -d |
By following these steps, you’ve successfully installed Nginx Proxy Manager on your Windows machine using Docker Compose.
Struggling with slow, unreliable proxy performance? RapidSeedbox is the solution.
Enhance your Nginx proxy management with our robust and reliable proxies.
Say hello to excellence!
————
4. How to use the Nginx Proxy Manager UI and configure it?
The Nginx Proxy Manager comes with a user-friendly web-based interface that gives you a way to configure and manage Nginx as a proxy server.
Let’s go quickly through the different aspects present in the Nginx Proxy Manager UI.
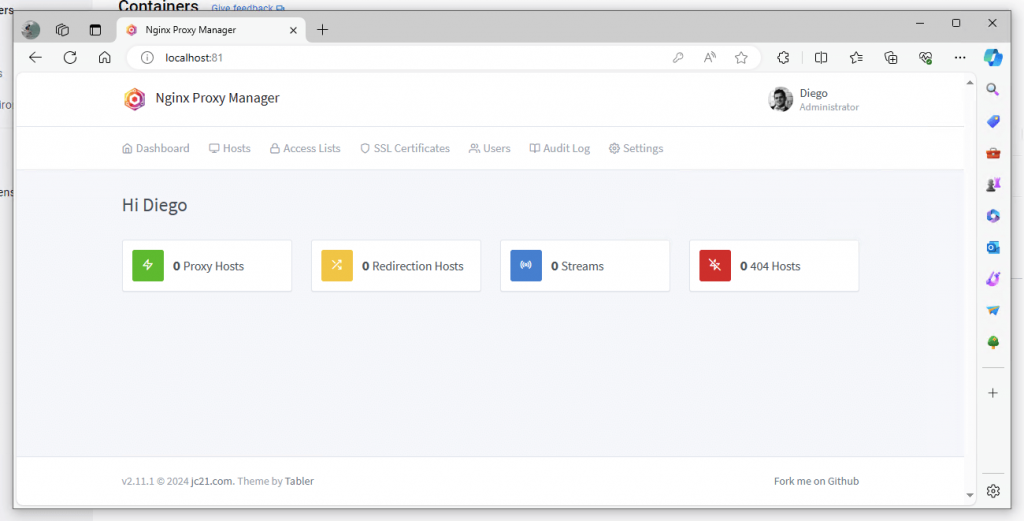
a. Dashboard
Comes with a clear layout showing a summary of Proxy Hosts, Redirection Hosts, Streams, and 404 Hosts. The dashboard’s design gives you an at-a-glance view of the server’s status and quick navigation to different configuration areas.
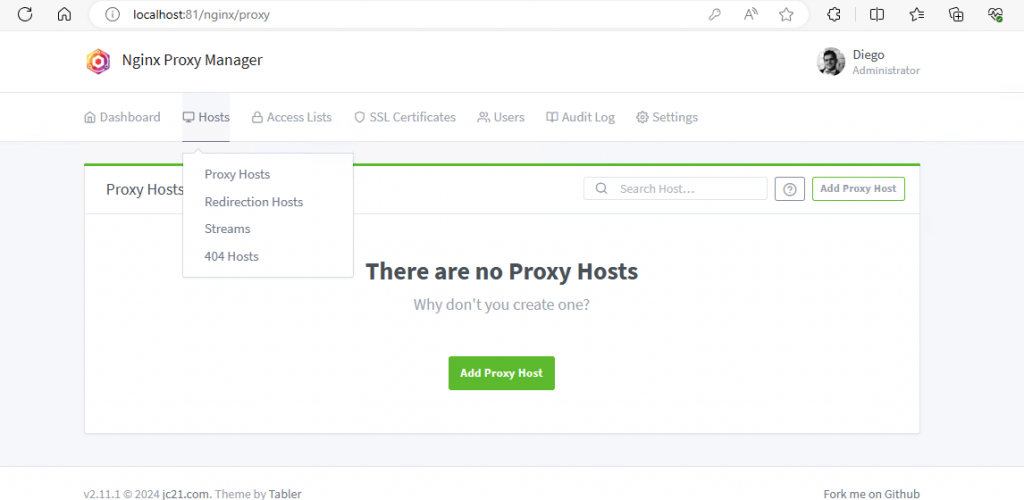
b. Hosts.
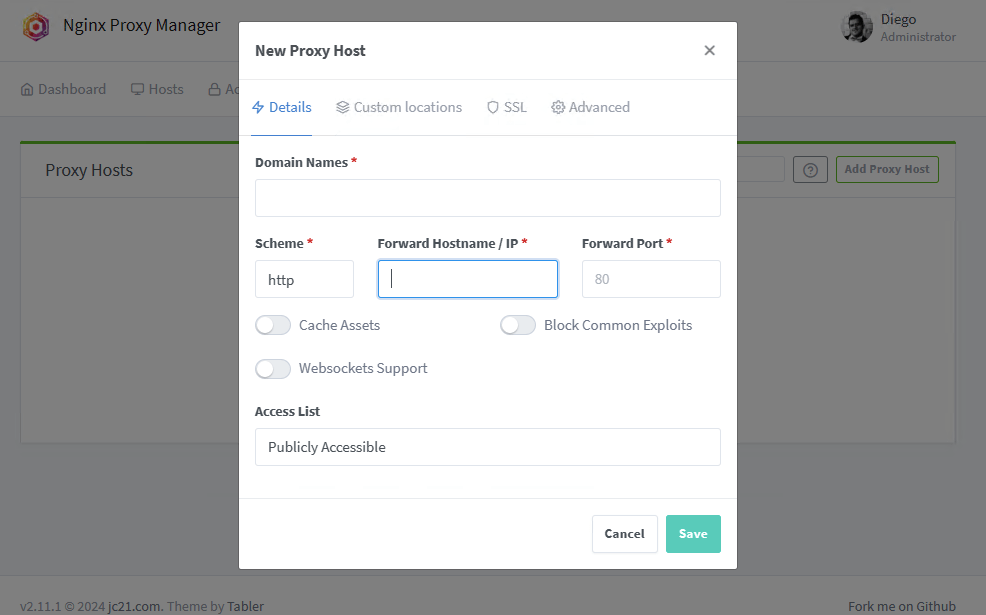
This section lists all the hosts including Proxy hosts, Redirection Hosts, Streams, and 404 Hosts. The important one is Proxy hosts which show the source and destination, whether SSL is configured, and their online status. You can also add a new proxy host by clicking the “Add Proxy Host” button, then inputting domain names, choosing the scheme, and setting forward hostname/IP and port. More on this in the next section.
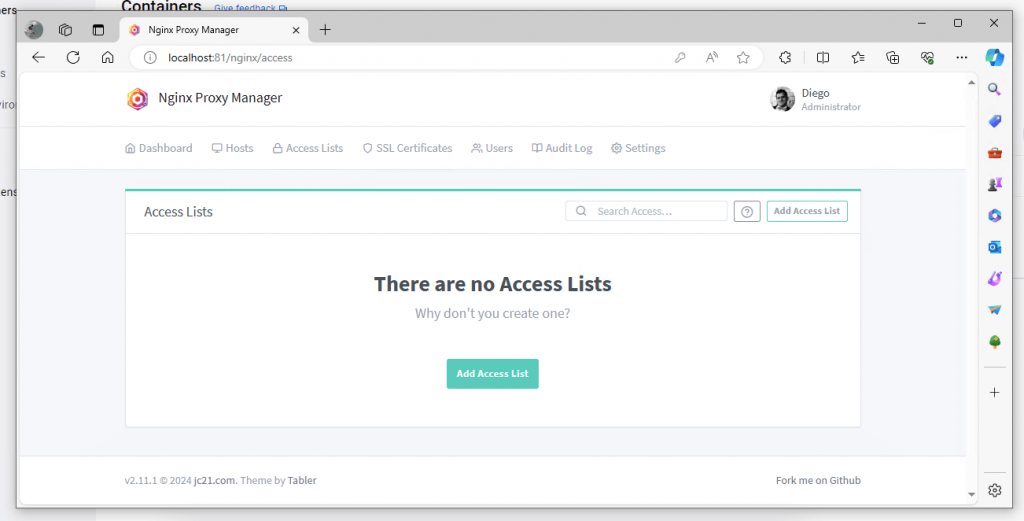
c. Access Lists
This section, allows you to manage access controls. It provides extra security by restricting which users can view or manage different hosts. You can also use the “Add Access List” to create a new one.
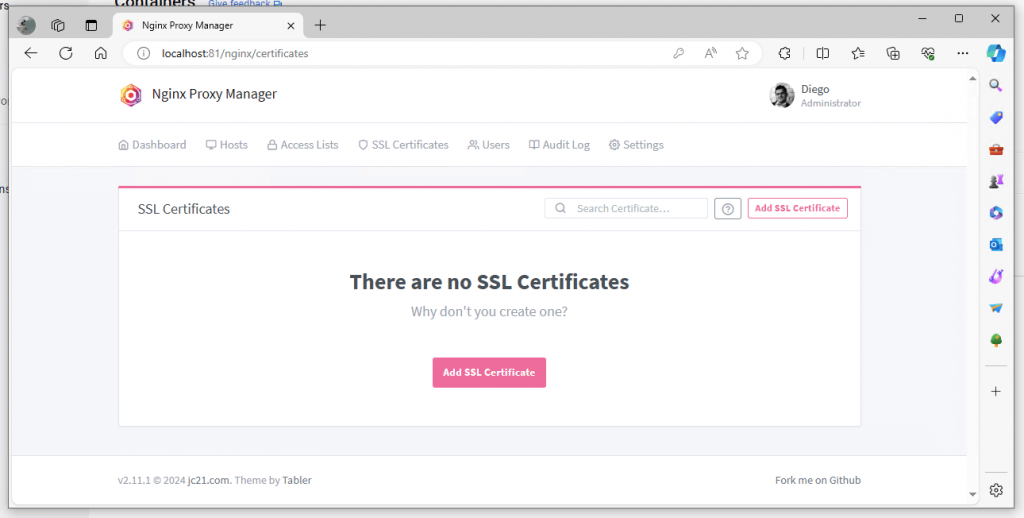
d. SSL Certificates
This section displays all the SSL certificates that are available or in use, including details like the provider and expiration date. There’s also an “Add SSL Certificate” button to secure your new hosts with SSL Certificates.
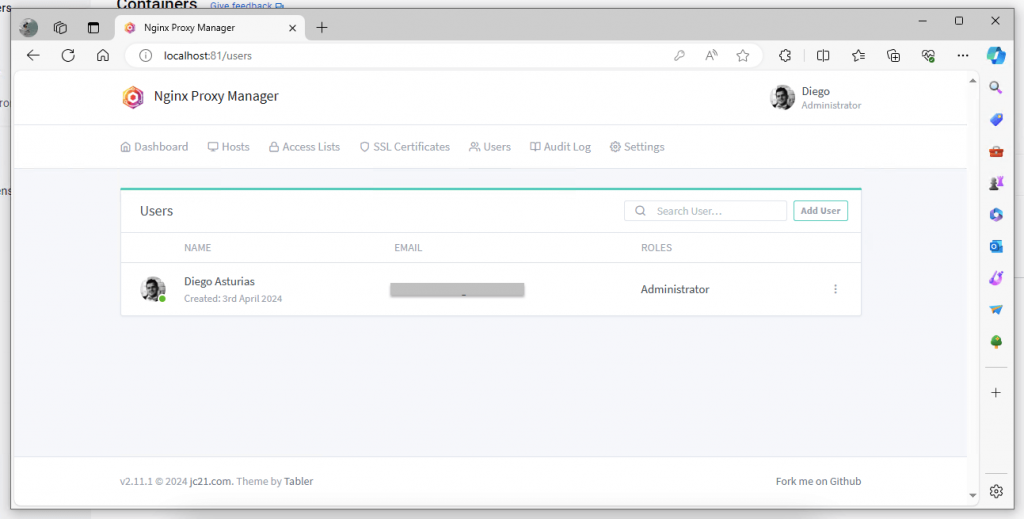
e. Users.
The Users section gives you a straightforward way to User management. It provides an overview of user permissions and the ability to add new users or modify existing ones.
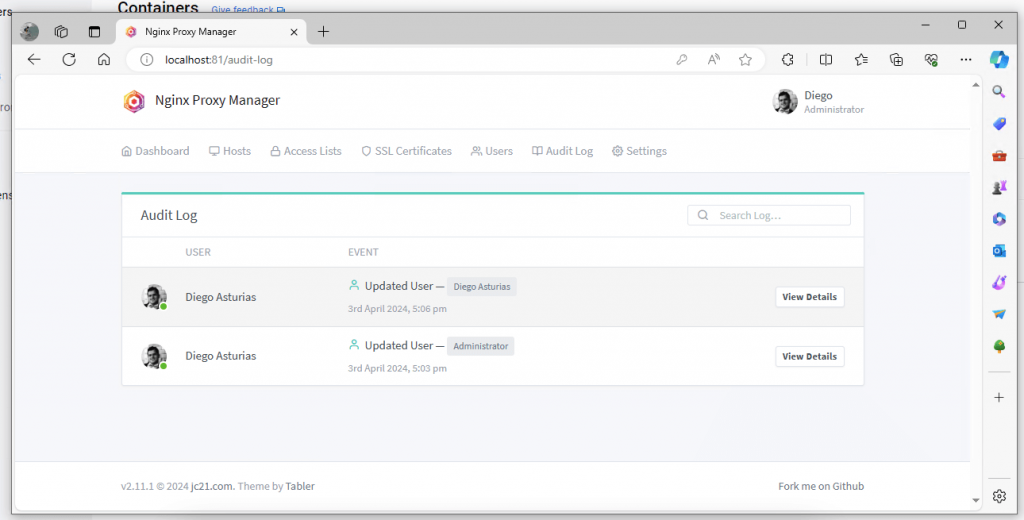
f. Audit Log
This part of the UI shows a history of actions taken within the Proxy Manager. This audit log includes events, updates to configurations, and SSL certificate renewals.
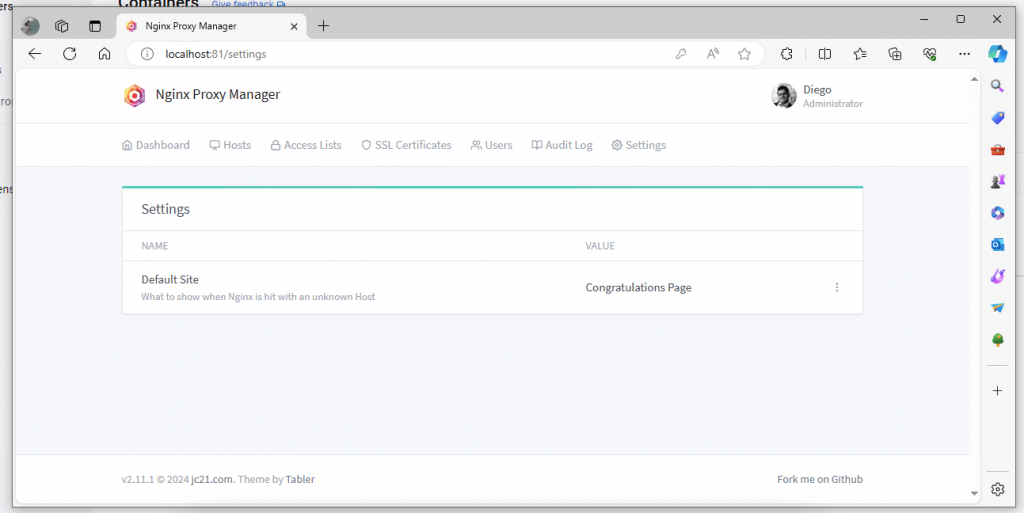
g. Settings
Settings offer customization for default behaviors, such as the response to unknown host accesses, with options for custom error pages. The following screenshot shows the default site (what to show when Nginx is hit with an unknown host).
🕶️ Pros don’t guess NGINX settings.
Get the exact directives top sysadmins use: Unlock the Config Guide5. Vital Configurations and Initial Setup.
Using the Nginx Proxy Manager UI, you can easily create and manage reverse proxies, apply SSL certificates, and fine-tune your server’s settings without knowing much about Nginx or command-line tools.
We recommend you start with the following basic configurations.
a. Set Up Proxy Hosts
- Go to the “Proxy Hosts” tab and click “Add Proxy Host.”
- Enter the domain name, choose HTTP or HTTPS, and provide the internal IP address and port of the service you’re proxying to.
- You can also change parameters like locations, assign SSL, and change custom Nginx configuration from here.
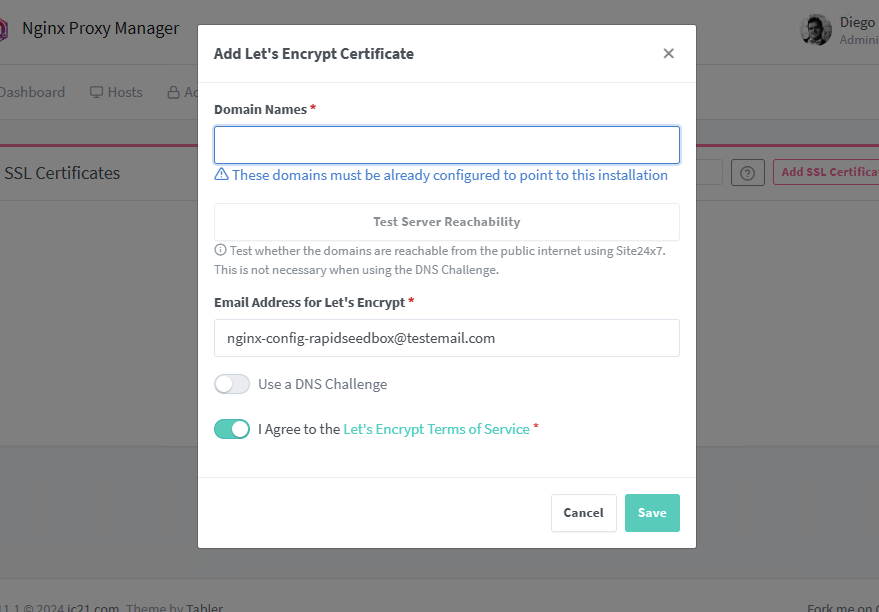
b. Configure SSL
Navigate to the ‘SSL Certificates’ tab. Click on ‘Add SSL Certificate’. Choose to request a new SSL via Let’s Encrypt or add your own certificate by providing the certificate and private key.
- Within the configuration panel “Add “Let’s Encrypt Certificate” add the Domain Name (as it states there; this must be already configured in Hosts). Add the email, agree to the Let’s Encrypt ToS, and give this Certificate a test through the Test Server Reachability.
- Add SSL Certificate: Assign SSL to Proxy Host: Go to the ‘Proxy Hosts’ tab. Click ‘Add Proxy Host’ or edit an existing host. Fill in the domain name and other necessary details. In the ‘SSL’ tab of the proxy host, select the SSL certificate you’ve added. Choose SSL options like HTTP/2 support, HSTS, and redirection of HTTP to HTTPS.
c. Configuring Firewall Rules.
While Nginx Proxy Manager does not directly handle firewall configurations, it can set rules that act similarly to a WAF.
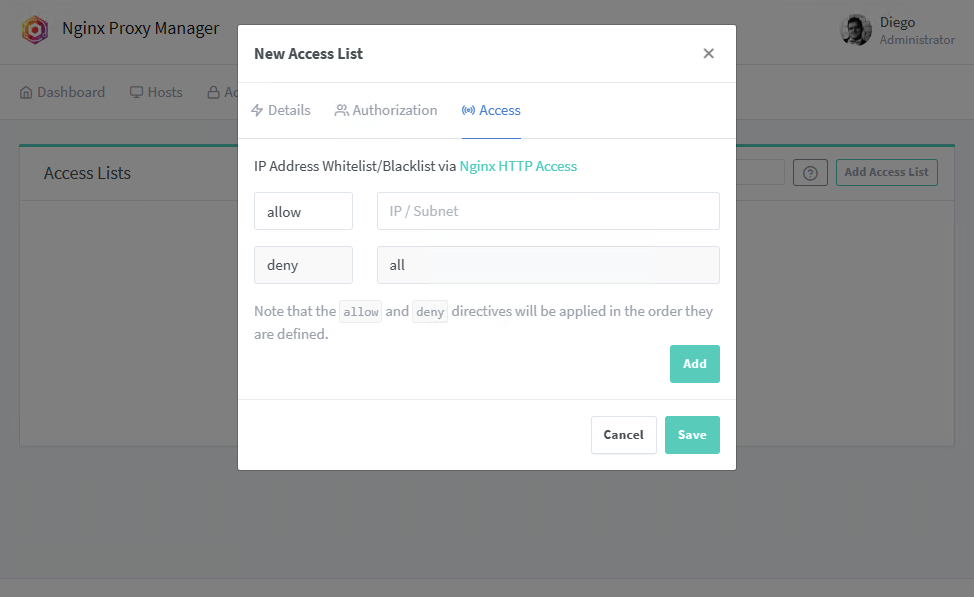
- Access Lists: In the ‘Access Lists’ tab, create a new access list. Define the rules for allowing or denying access based on IP addresses or ranges. You can also enable authorization, requiring a username and password to access certain services.
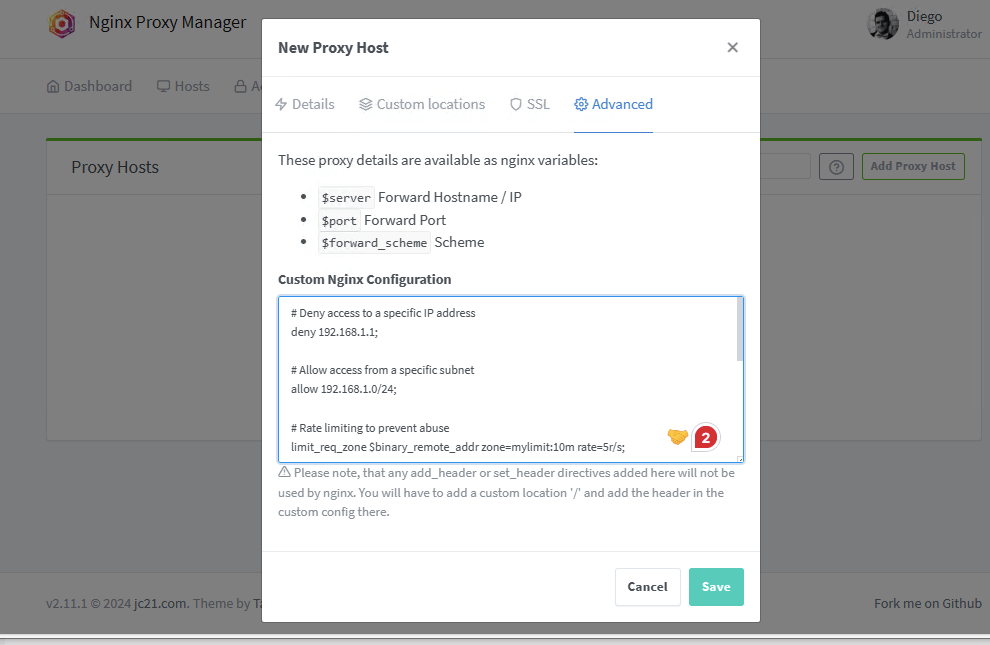
- Proxy Host Advanced Configuration: In the ‘Proxy Hosts’ details, switch to the ‘Advanced’ tab. Enter custom Nginx directives to control access, limit request rates, or deny problematic user agents and IPs.
- You might add rules like deny or allow directives to block or allow specific IP addresses or ranges.
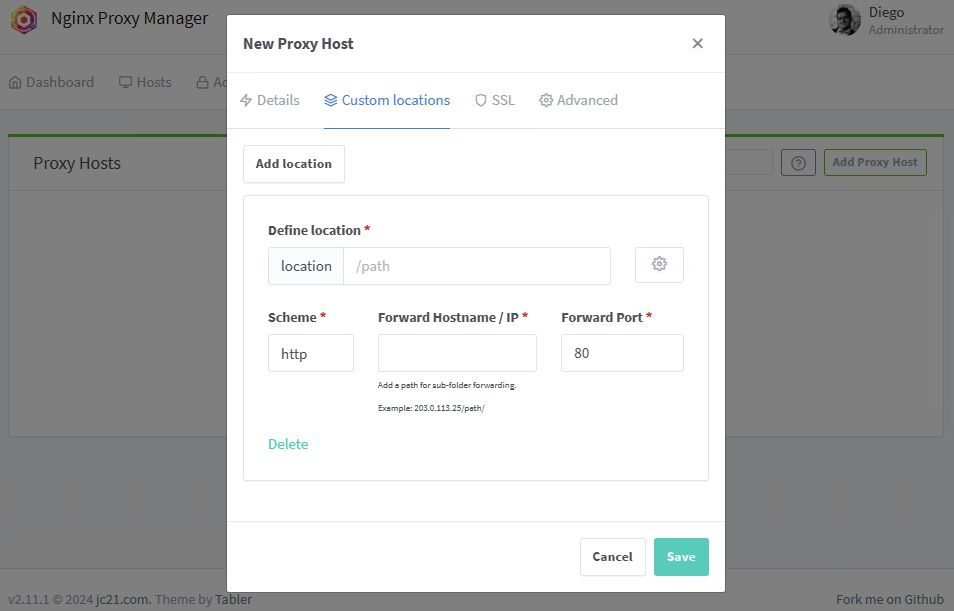
- Custom Locations: Go to the ‘New Proxy Host’ setup (or edit an existing proxy host). Here, you can define specific URL paths (location) and forward them to different hostnames and ports.
- This allows you more granular control over the routing of incoming traffic to your internal services.
6. Nginx Proxy Manager FAQ.
a. What is the relationship between NGINX and the Nginx Proxy Manager?
NGINX is an open-source web server. NGINX Proxy Manager, or NPM, on the other hand, is an open-source tool that simplifies NGINX management. The former is a management layer that simplifies the configuration and management of Nginx.
b. What are some alternatives to Nginx Proxy Manager?
Alternatives to Nginx Proxy Manager include Traefik, Caddy, Apache HTTP Server, HAProxy, WinGate, and OpenResty. They are worth exploring to determine the best fit for your specific requirements and infrastructure. Bear in mind that these alternatives vary in features, performance, and configuration complexity.
c. How do I set up SSL termination with Nginx Proxy Manager?
SSL termination can be set up in Nginx Proxy Manager. Start by creating a new proxy host, then enable SSL in the SSL tab, and finally choose to request a new SSL certificate from LetsEncrypt. You can also import an existing certificate.
d. Can Nginx Proxy Manager be used for load balancing?
Yes, it can be configured for load balancing. You can do this by setting up multiple backend servers for a single proxy host and adjusting the load balancing method in the ‘Advanced’ settings. Learn more about the differences between Reverse Proxies and Load Balancers
e. What are the steps to configure Nginx Proxy Manager with Docker and Docker Compose?
For the full guide to configure Nginx Proxy Manager with Docker Compose, refer to the guide (section 3). But here are the steps in a nutshell:
- Install Docker and Docker Compose.
- Create a docker-compose.yml file with the Nginx Proxy Manager service definition.
- Run docker-compose up -d to start the container.
- Access the web UI at http://<host-ip>:81 to finish the setup.
f. Can I manage reverse proxies with Nginx Proxy Manager?
You can manage reverse proxy servers with NPM. A reverse proxy server routes client requests to the appropriate backend server. This enables you to host multiple applications or services behind a single IP address (and add a certain level of security).
g. How can I implement access control and rate limiting with Nginx Proxy Manager?
Access control and rate limiting can be configured under the ‘Advanced’ tab of a proxy host. You can add custom Nginx directives to allow or deny specific IP addresses and limit request rates to prevent abuse.
h. How do I manage SSL certificates in Nginx Proxy Manager, including auto-renewals with LetsEncrypt?
SSL certificates are managed in the ‘SSL Certificates’ tab, where you can request a new SSL from LetsEncrypt, which will be auto-renewed upon expiration. Alternatively, you can upload custom SSL certificates if required.
7. Final Words.
In this article, we explored the basics of Nginx Proxy Manager (NPM). This tool is so powerful and extensive, that we only touch the tip of the iceberg. If you want to explore more, we recommend going through the official documentation (README file).
In the guide, we went through the basics, full description, and comparison with the native Nginx proxy management tool. The guide touched everything, from installation to configuration and practical use cases. It provided valuable insights into leveraging NPM for efficient web service management.
We hope this guide was useful. If it was or wasn’t, please leave your comments and suggestions below. We are eager to hear from you!
Hello Diego,
a very informative article, but I still have one question.
When using an Nginx web server behind an NPM (all in single VM’s ), which is irrelevant to the question.
If I want to apply a security header for the web application, where does it have to be entered?
1. on the NPM or 2. on the NGINX web server? It should work in both systems, but where is it best from a security point of view?
Greetings Juergen
*** Translated with http://www.DeepL.com/Translator (free version) ***
Hi Jurgen, it’s best to apply the security headers on the NPM, primarily for centralized security, early interception of bad requests, and header mod prevention. However, there are some caveats. For example, if your NPM is only meant to be a reverse proxy, or if you require dynamic headers that are dependent on application logic. Otherwise, NPM header config is the way to go.