WinGate is a cutting-edge Internet management tool that not only serves as a proxy server but also offers robust VPN and security features. This tool excels in streamlining Internet access, enhancing network security, and simplifying web content management.
Want to learn more?
This guide will help you understand WinGate’s capabilities, from basic setup to its advanced features, so you can effectively manage and secure your network environment.

Disclaimer: This material has been developed strictly for informational purposes. It does not constitute endorsement of any activities (including illegal activities), products or services. You are solely responsible for complying with the applicable laws, including intellectual property laws, when using our services or relying on any information herein. We do not accept any liability for damage arising from the use of our services or information contained herein in any manner whatsoever, except where explicitly required by law.
Table of Contents
- Introduction to WinGate
- Setting Up WinGate
- Starting Up with WinGate
- Using WinGate as a Proxy Server, Firewall, and VPN
- FAQ: Understanding WinGate’s Features
- Final Words
1. Introduction to Wingate.
Although WinGate (official website) is advertised as a web proxy server for Windows, in reality it is far more than that. It is, instead, a versatile Internet management software that facilitates secure connectivity and network control. The software provides proxy capabilities, email solutions, and VPN capabilities, along with malware protection through a Kaspersky integration.
WinGate supports essential Internet protocols and offers a free version for small user groups. It is a comprehensive network administration tool rather than a standalone proxy provider.
Interesting Fact: WinGate is developed by Qbik IP Management Limited., an New Zealand-based Internet connectivity and security company established in1995. As of January 2026, its latest version is 9.4.7, offering a free option for up to 10 users.
Who is Wingate Recommended for?
Wingate is a major player in the corporate proxy management field, alongside other notable proxy managers. Designed primarily for enterprise clients, it excels in monitoring networks and network resources. However, it’s also adaptable for single-machine connections.
Wingate’s key features:
- Advanced Proxy Capabilities: It works as a versatile server, offering advanced caching HTTP proxy, SOCKS server, multi-protocol proxy, email, and internet gateway solutions for Windows. The app is versatile, supporting all essential protocols related to proxy server operations. These include HTTP(S), SMTP, POP3, among others.
- Web Content Management: The software actively intercepts, caches, and scans web content, including HTTPS traffic. It empowers administrators to control and monitor user web access, addressing legacy TLS version issues.
- Malware Scanning: This tool is effective in both preventing and detecting intrusions and malicious attacks. It collaborates with Kaspersky Labs‘ scanning engine, checking both its traffic and web browsing for malware and exploits.
- Content Classification Plugin: The Lumen plugin allows administrators to set access policies based on website classifications, simplifying site access management.
- Proxy Manager. WinGate is a proxy manager because it acts as a gateway, routing and managing internet traffic for multiple users within an organization. It performs various functions such as web caching, filtering, and traffic monitoring.
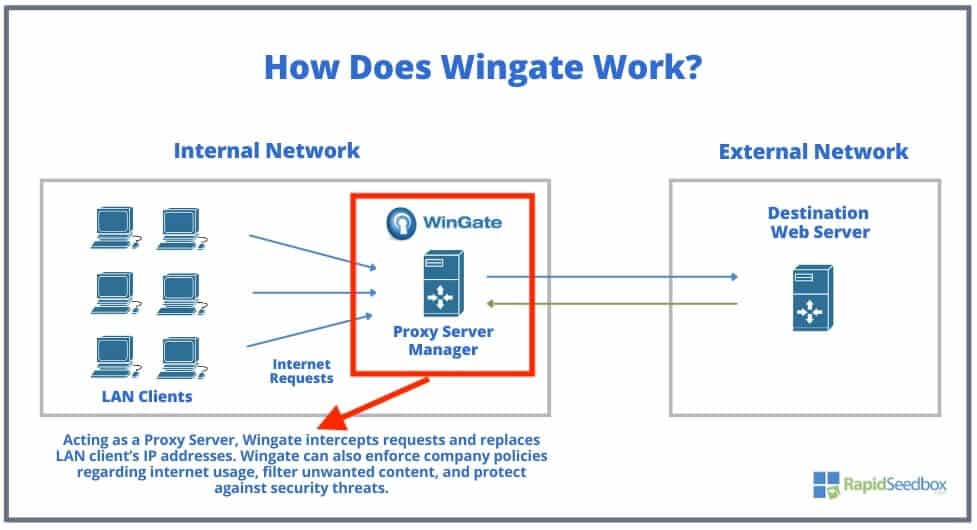
How does Wingate work?
WinGate acts as a go-between for an internal network and the outside world. It handles internet requests from LAN clients, filtering out unwanted or harmful content and enforcing company policies on internet usage. It also protects the internal network from potential threats by preventing direct exposure. Additionally, it replaces internal IP addresses, which help anonymize traffic and protect network integrity.
What is not Wingate?
WinGate itself is not a provider of proxy servers in the sense of offering individual proxy server addresses for rent or use like typical proxy services (such as Rapidseedbox or other proxy providers). Instead, it is an integrated software solution that enables a machine to act as a proxy server. In addition, many people also confuse it with the private proxy wingate.me provider — a Russian provider of SOCKS5 and HTTP private proxies (read more about wingate.me in our full review)
2. How to set up WinGate?
Now that you know the basics of what it is, its features, how it works, and what is not, let’s go through the steps of downloading and installing it on your Windows machine.
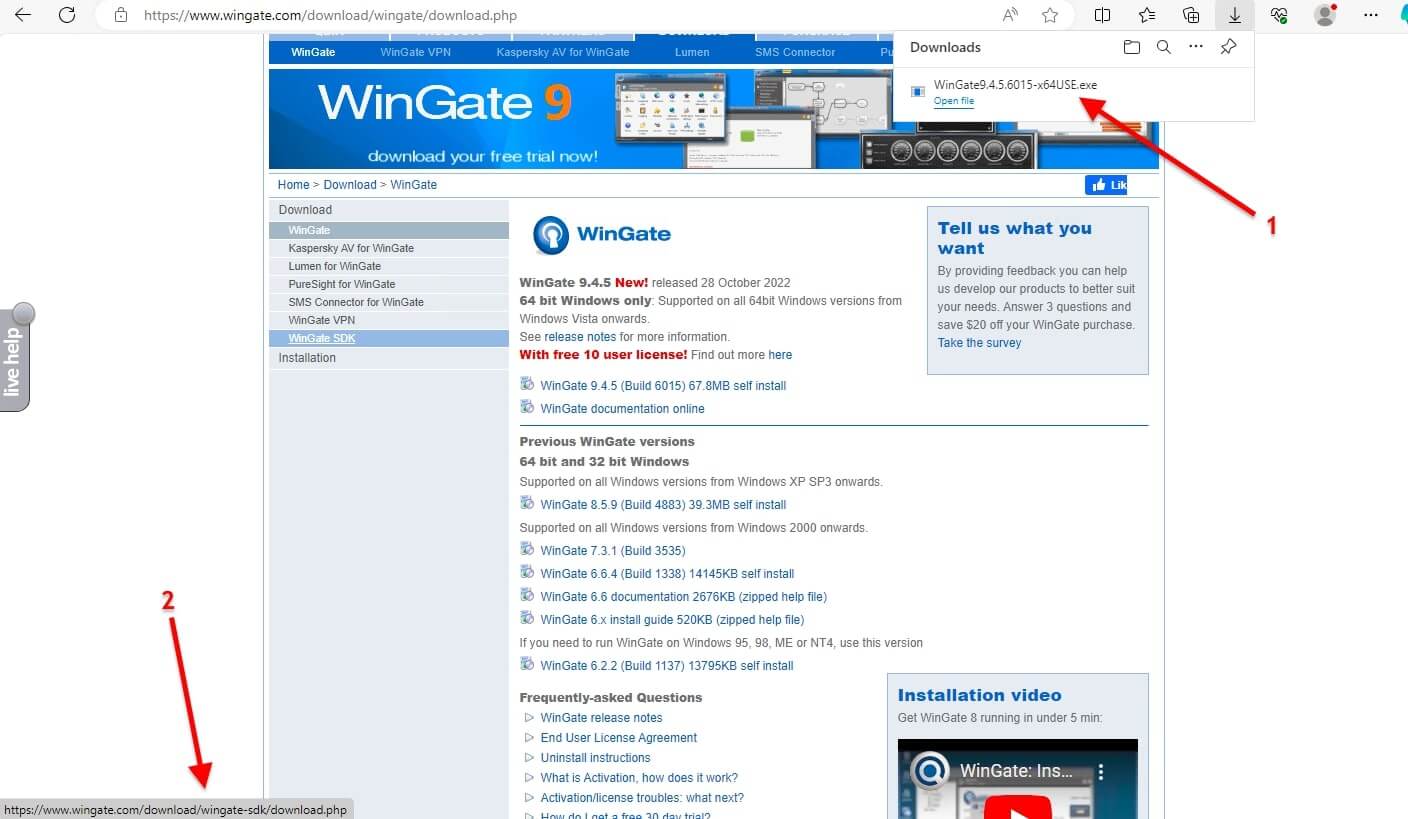
- Downloading the Installer: You start by navigating to the official WinGate website. Here, you find the version you need to download. Click on the appropriate download link for WinGate. The latest version is 9.4.5, and the installer file is named ‘WinGate9.4.5.6015-x64USE.exe’,
- It will begin to download on your system. Ensure you are downloading from the official site and the right file as indicated by the red arrows in the following picture.
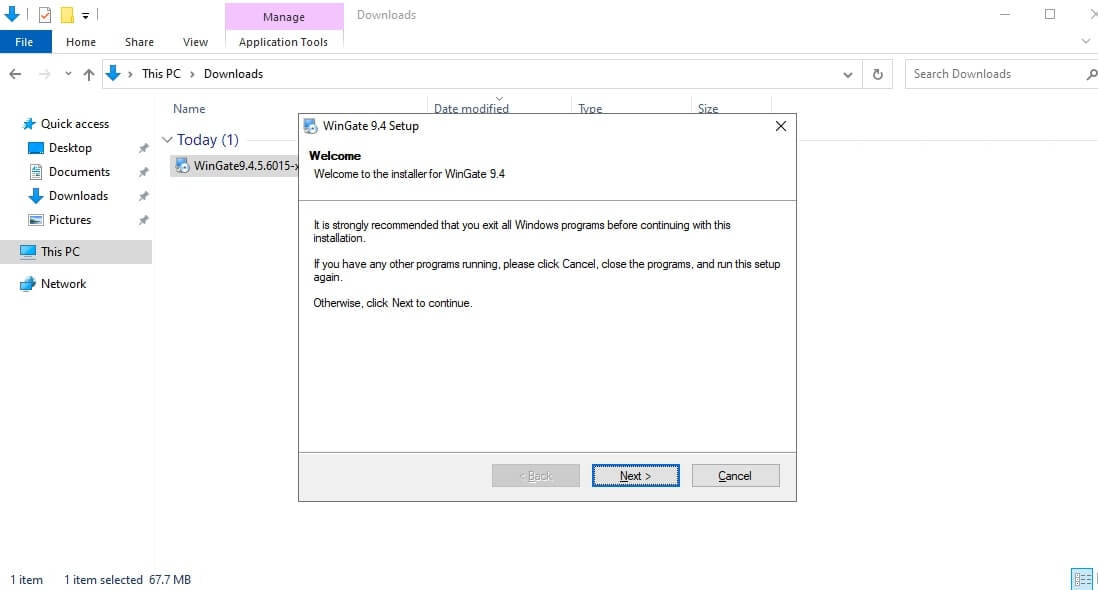
- After downloading the installer, navigate to your Downloads folder and double-click on the ‘WinGate9.4.5.6015-x64USE.exe’ file (or the version file that you downloaded).
- The installer window pops up and advises you to close all other Windows programs before continuing for a smoother setup process. Click on ‘Next’ to proceed with the installation.
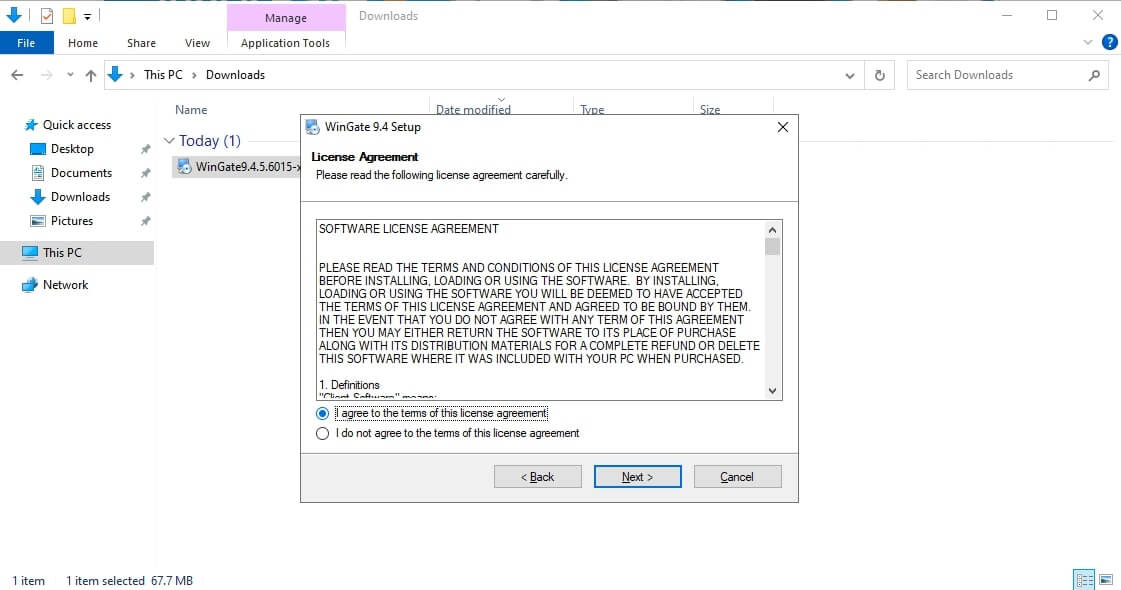
- Read and agree to the software license agreement before proceeding with the installation. If you agree, select “I agree to the terms of this license agreement”. The ‘Next’ button will become clickable, allowing you to proceed with the installation.
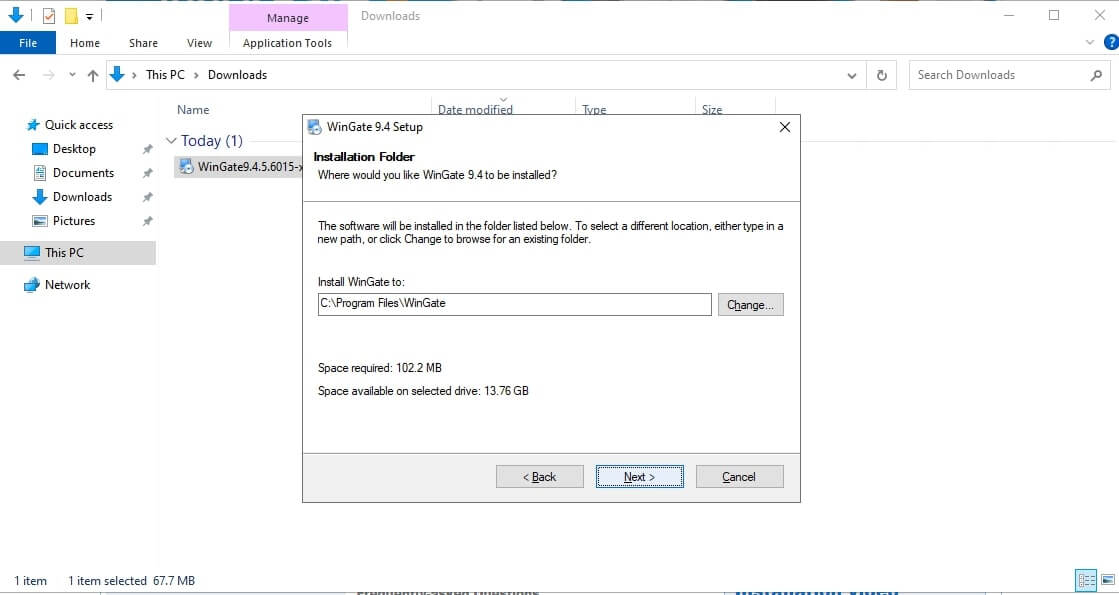
- You’ll now need to choose the installation folder. The default is ‘C:\\Program Files\\WinGate’. You can change the directory by clicking ‘Change…’. The installation requires 102.2 MB of space. Once you’ve decided on the location, proceed to the next step.
Select specific components of WinGate to install.
- In the ‘Select Packages’ screen, you’ll see options such as ‘WinGate Service’, ‘WinGate Management’, and ‘WinGate Network Driver’. Choose the components you need based on your requirements.

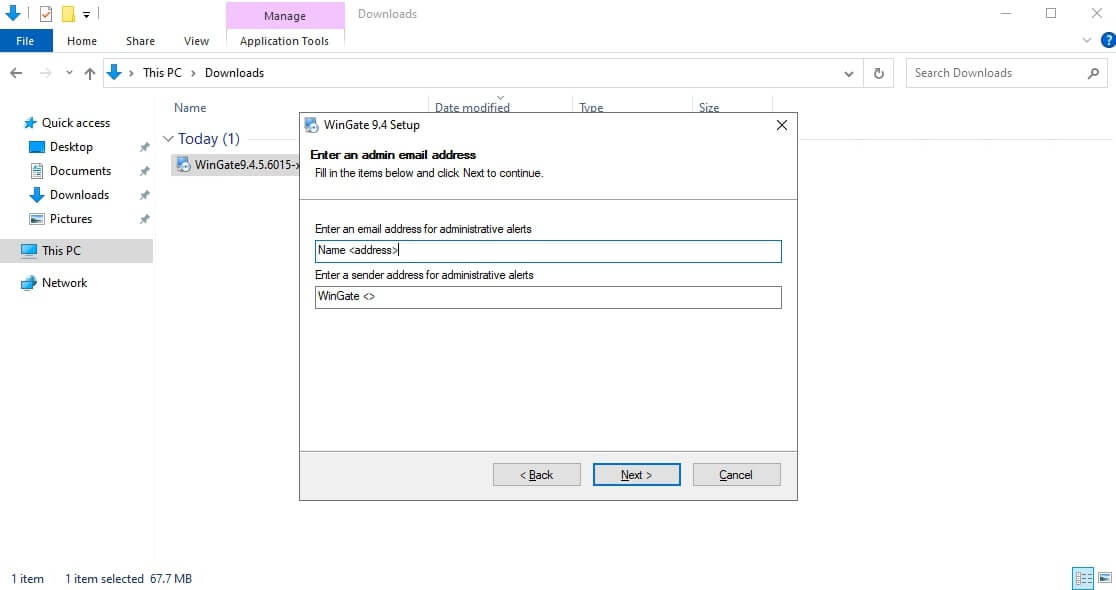
- You’ll now be asked to enter an email address for administrative alerts. This is an important step for managing it because it ensures that you’ll receive notifications about critical events, such as updates or security issues. You’ll need to fill in two fields:
- The first field is for the email address where you want to receive the alerts.
- The second field is for the sender’s address that will appear in the alerts you receive. The default sender’s address is already filled in as ‘WinGate’.
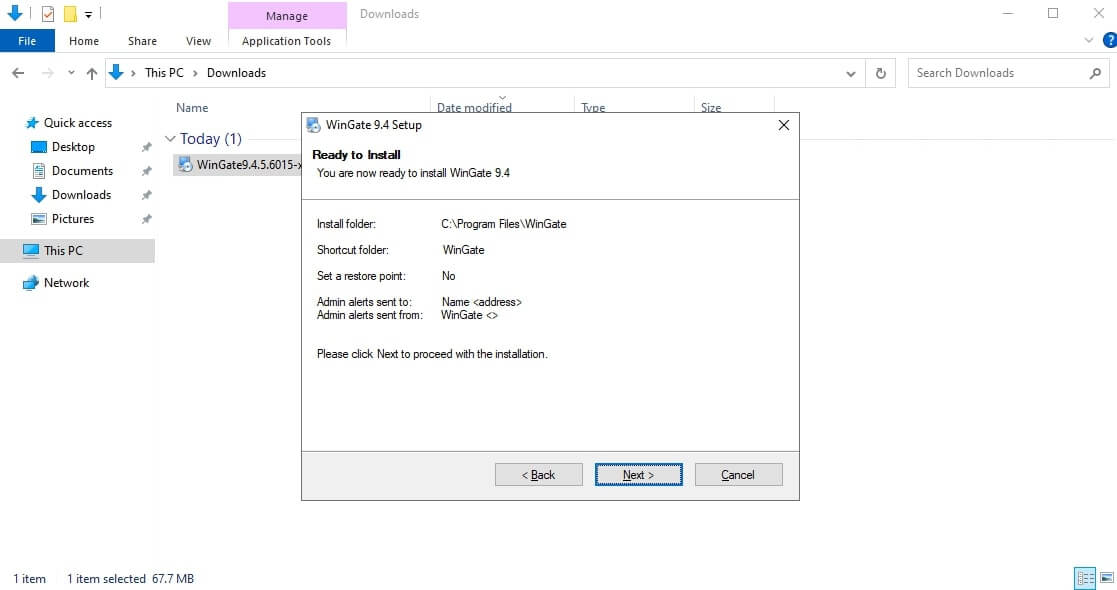
- You’ll reach the final confirmation screen before the installation of version 9.4 begins. Here, you are provided with a summary of your selected installation options:
The installation of Wingate will begin.
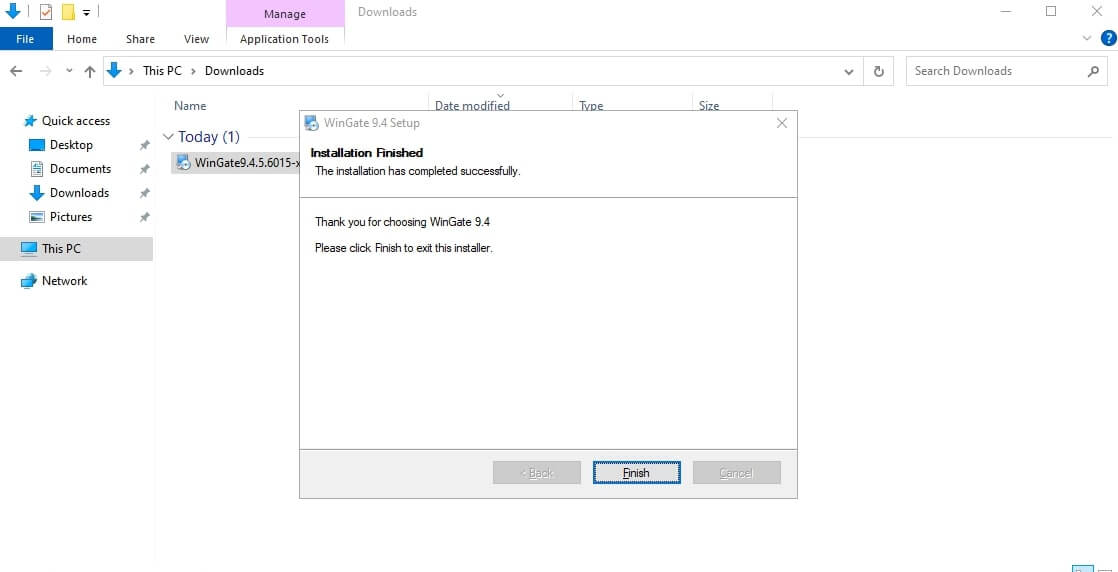
- Once installation finishes, a window will appear confirming that the installation has been successfully completed.
- To finalize the process, simply click the ‘Finish’ button.
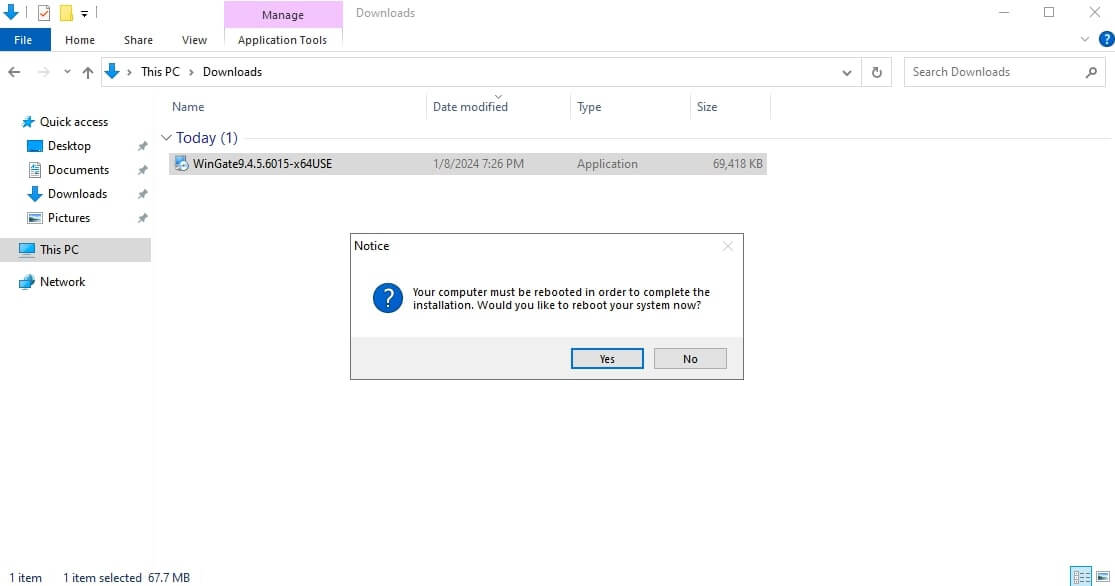
After installation, a prompt appears asking if you want to reboot your system. It is recommended to reboot your computer immediately to ensure that all components of the software are properly initialized and configured.
Improve WinGate’s experience with RapidSeedbox’s proxy services.
Benefit from high-speed, secure, and anonymous IPv4 and IPv6 proxies, ideal for activities like SEO optimization, web scraping, and market research. Also, enjoy 24/7 support and a 24-hour money-back guarantee.
3. Starting up with Wingate
In this section, we will go through identifying the installed software, activating the incense, and an overview of the main dashboard.
a. Verifying the installation and starting up the server.
Now, that it is installed on your Windows server, let’s verify the installation, whether it is running, its licensing state, and how to open it.
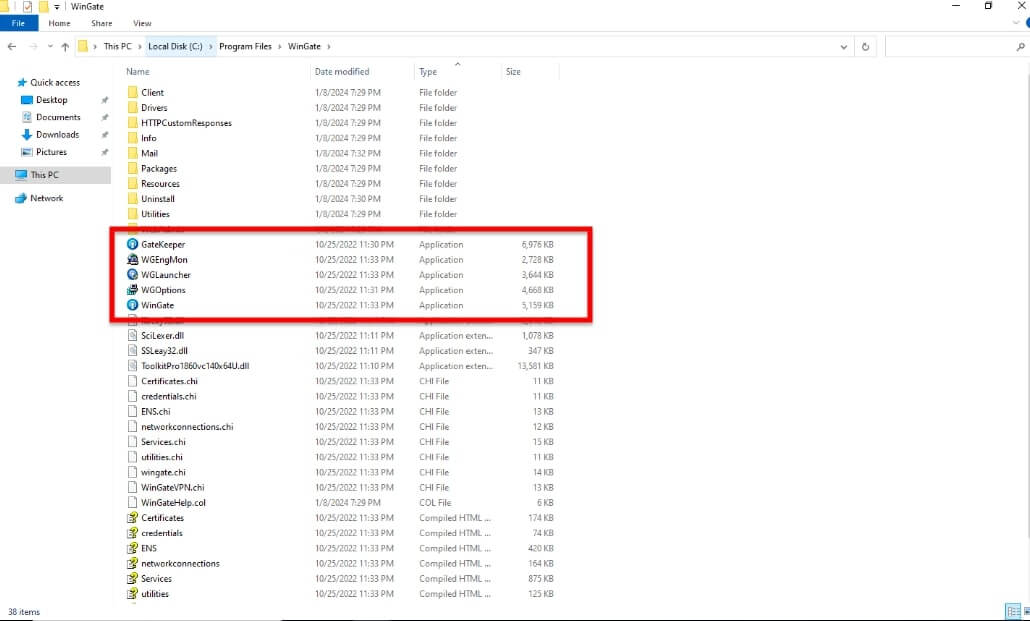
After rebooting your Windows server, go ahead and check to ensure it is installed correctly. Go to the directory on your local disk (usually the C: drive) and find the folder. Inside the folder, you’ll see various files and executables related to the WinGate software, such as:
- GateKeeper: The application used to manage the software.
- WGEngMon: A monitoring tool for the engine.
- WGLauncher: An application used to start various services.
- WGOptions: A utility to configure the settings.
- WinGate: The main executable for the software.
- Double-click on WinGate app (1).
- An indicator in the bottom right corner of the Windows screen indicates that it is running (2). You can now configure it or start using the service.
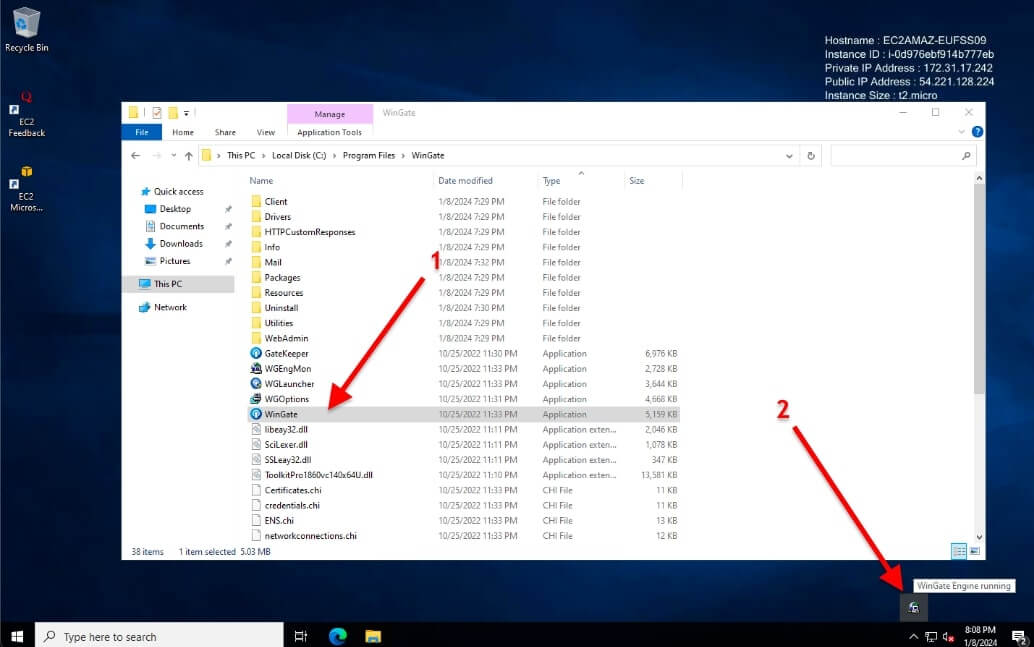
In our case, we are connected to the localhost (for configuring and managing the software), but this can also be a remote server.
b. WinGate Licensing.
WinGate’s licensing is based on the number of concurrent users connected to it, not per seat. They offer a free license for up to 10 users, with Standard, Professional, and Enterprise versions offering varying features. Prices range from $109.95 for 6 users under Standard to $2249.95 for unlimited users under Enterprise. Discounts may be available for educational, non-profit, and governmental organizations.
For this Wingate guide, we will be using the free trial.
License activation for WinGate:
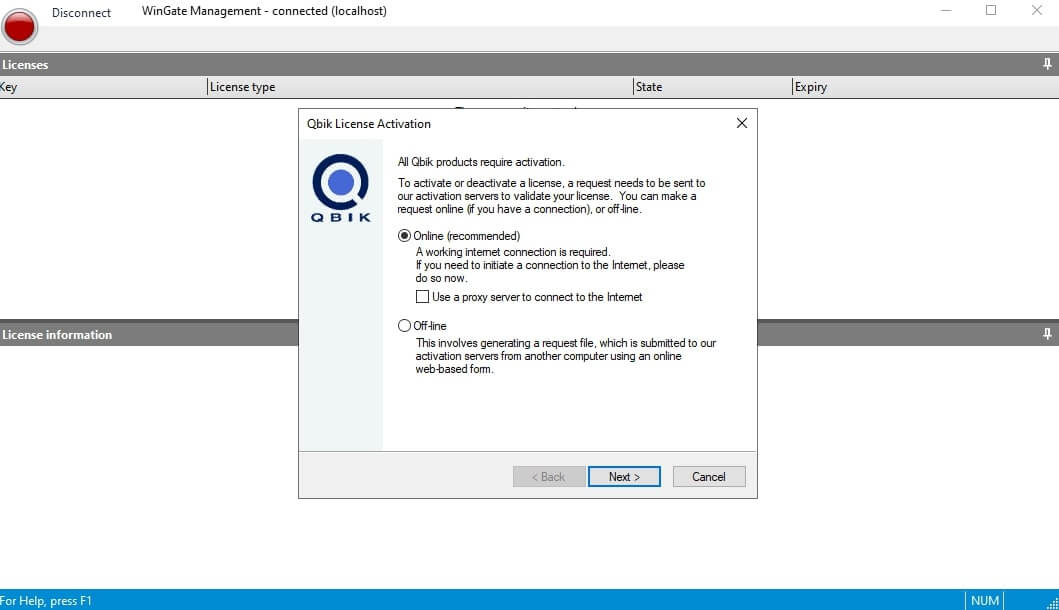
Now that WinGate is installed, you’ll be brought to the Qbik License Activation window within the the Management console. Here, you’re required to activate your product
To activate WinGate, you will need to:
- Open the Qbik License Activation window in the the Management console.
- Select an activation method. Either an online activation or offline activation
- Follow the instructions on the screen to complete the activation process.
Entering License Information
- When entering your license information for the software, you can:
- Activate a purchased license by entering your license key.
- Activate a free fully-featured 30-day trial.
- Activate a free license, which might provide limited features or usage (up to 10 users).
- Read and select the licensing option that best fits your needs. Click ‘Next’ to proceed. Click ‘Back’ to go to the previous screen or ‘Cancel’ to exit the license activation process.

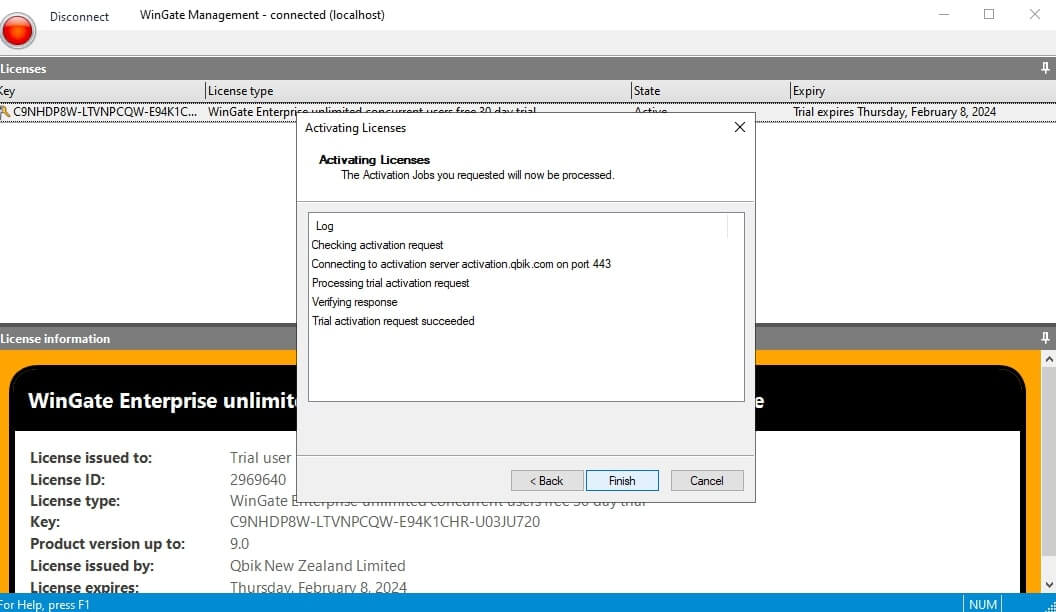
- Your license will be active.
- We activated an Enterprise trial license which is now active.
- Click Finish to close this window and start using it.
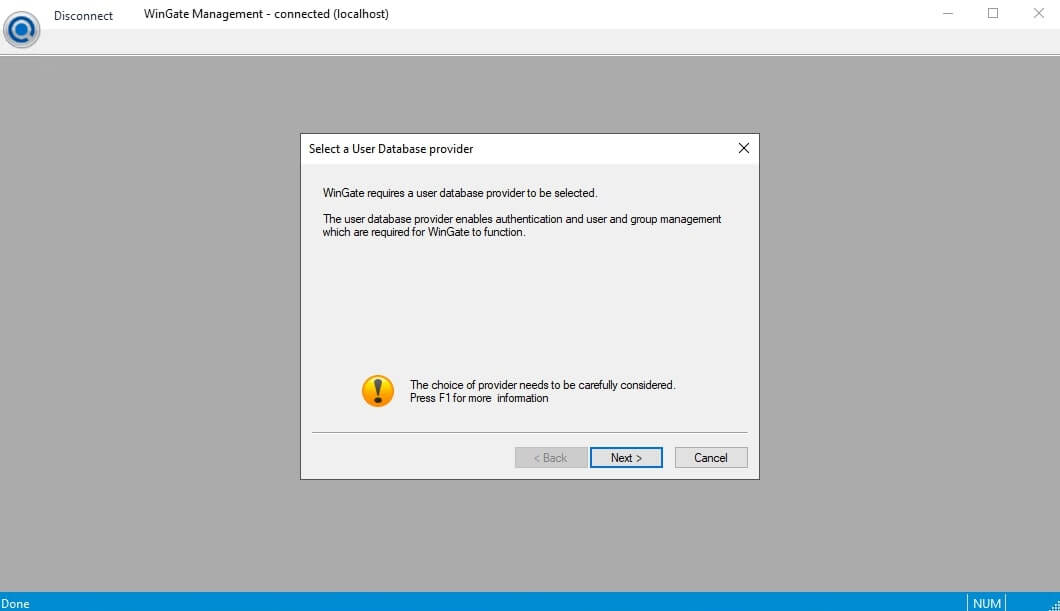
- In the WinGate setup, you need to choose a user database provider to manage user authentication and groups. Take your time to decide, as it’s crucial for the software to work correctly.
- For more info, press F1. When ready, click ‘Next’ to continue.
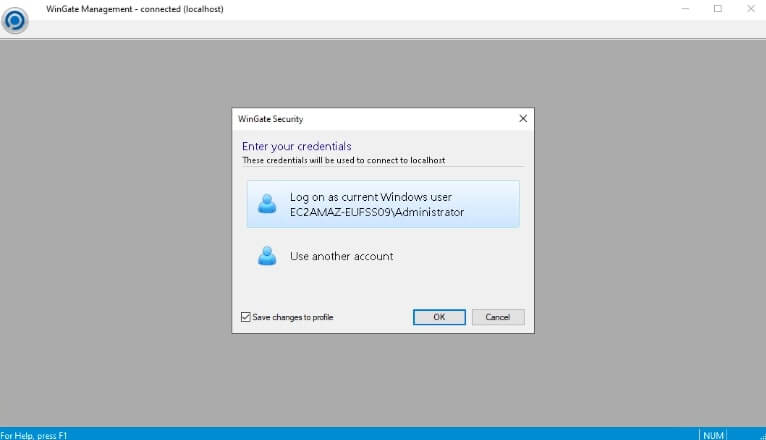
- To access the Management console, input your credentials. You can log in with your current Windows user account or use another account. To save this preference for future logins, tick the ‘Save changes to profile’ box.
- Click ‘OK’ to proceed or ‘Cancel’ to go back. Press F1 for assistance.
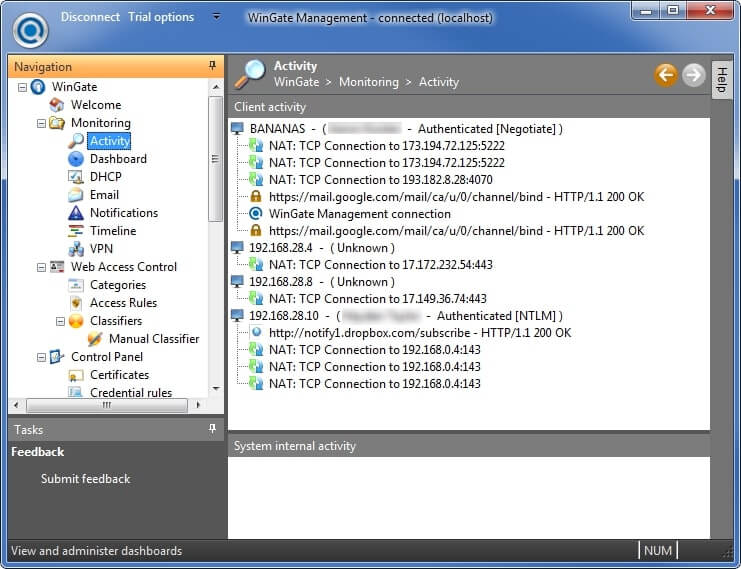
c. Wingate’s Main Navigation Panel.
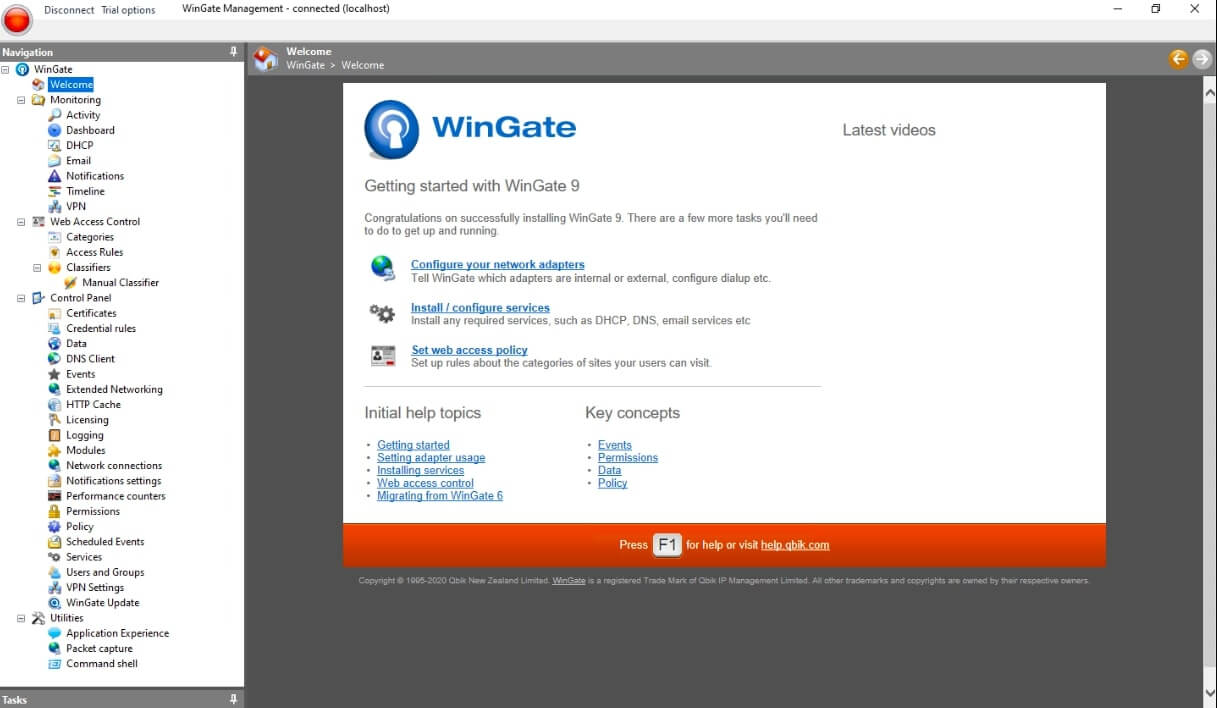
Once logged to Wingate though your preferred security method, the main dashboard will open.
The main dashboard of the Management console, is a tool for managing and monitoring all your network connections and services.
Here’s a brief description of the main items you’ll find in the navigation panel for the software, located on the left side:
- Monitoring
- Web Access Control
- Control Panel
- Utilities
The Navigation Panel (in detail)
The navigation panel contains a variety of sections for managing different aspects of the application:
Monitoring
This allows you to observe real-time data and logs related to network traffic, system performance, usage statistics, and more. Subsections include:
- Web Access Control: Helps you manage internet access through rules and policies, including content filtering, and more.
- Categories: Manage categories for web content filtering.
- Access Rules: Define and manage rules for web access.
- Classifiers: Specify criteria for classifying web traffic.
- Manual Classifier: Manually classify web traffic that may not fit predefined rules or categories.
Control Panel
It is a central configuration area where you can manage certificates, DNS, networking, and system settings.
- Certificates: Manage SSL certificates for secure communications.
- Credential rules: Define authentication rules for network access.
- Data: Data storage settings for logs and databases.
- DNS Client: Configuration settings for DNS services.
- Events: Event management and response settings.
- Extended Networking: Advanced network settings and configurations.
- HTTP Cache: Settings for caching web content to improve performance.
- Licensing: Manage and view WinGate license information.
- Logging: Configure system logs for various services and events.
- Modules: Manage and configure additional WinGate modules.
- Network connections: View and manage active network connections.
- Notifications settings: Configure notification settings for system events.
- Performance counters: Monitor and manage performance metrics for the server.
- Permissions: Set user and group permissions for various actions and areas within WinGate.
- Policy: Develop and enforce network usage policies.
- Scheduled Events: Configure and manage events to occur at scheduled times.
- Services: Overview and management of WinGate services.
- Users and Groups: Manage user accounts and group memberships.
- VPN Settings: Settings related to Virtual Private Network connections.
Utilities
Here you can find tools for system maintenance and network analysis, like packet capturing and command shell access.
- Application Experience: Tools to ensure applications run optimally within the network.
- Packet capture: Network packet capturing for analysis and troubleshooting.
- Command shell: Access to a command-line interface for advanced system management.
4. Using WinGate.
WinGate is a complex tool that can be configured in many different ways to suit specific network requirements. In this section we will go though a couple of popular use cases for using this fantastic tool, more especifically setting it up as a proxy server, configuring it as firewall, and as a VPN.
Note: Always refer to the WinGate documentation for detailed instructions or contact their support for assistance with complex configurations. Additionally, for any changes to the network infrastructure or security, it is recommended to have a network administrator or a professional with appropriate expertise to conduct or supervise the setup.
Setting Up WinGate as a Proxy Server:
First, ensure that WinGate is installed on a dedicated server that is connected to your network and has internet access. Go back to the previous sections to learn how to install it and start using it.
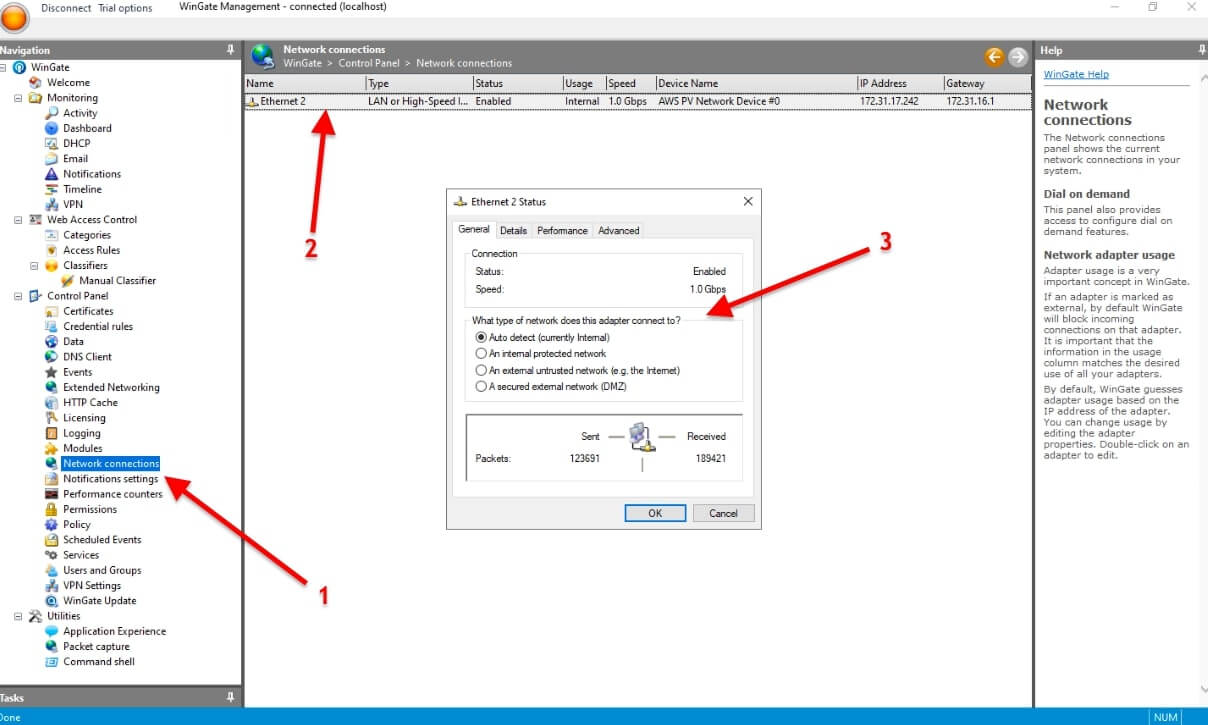
Configure Network Settings
Configure the network settings in WinGate to suit your network topology. This includes setting up the network adapter that connects to the internet (external) and the one that connects to the LAN (internal).
- Go to Control Panel > Network Connection > Choose the appropriate network adapter (external and internal).
- In our case, we only have a network adapter for internal usage, which is receiving a public IP through DHCP, but if your setup (or server) has two network adapters, it should be shown here.
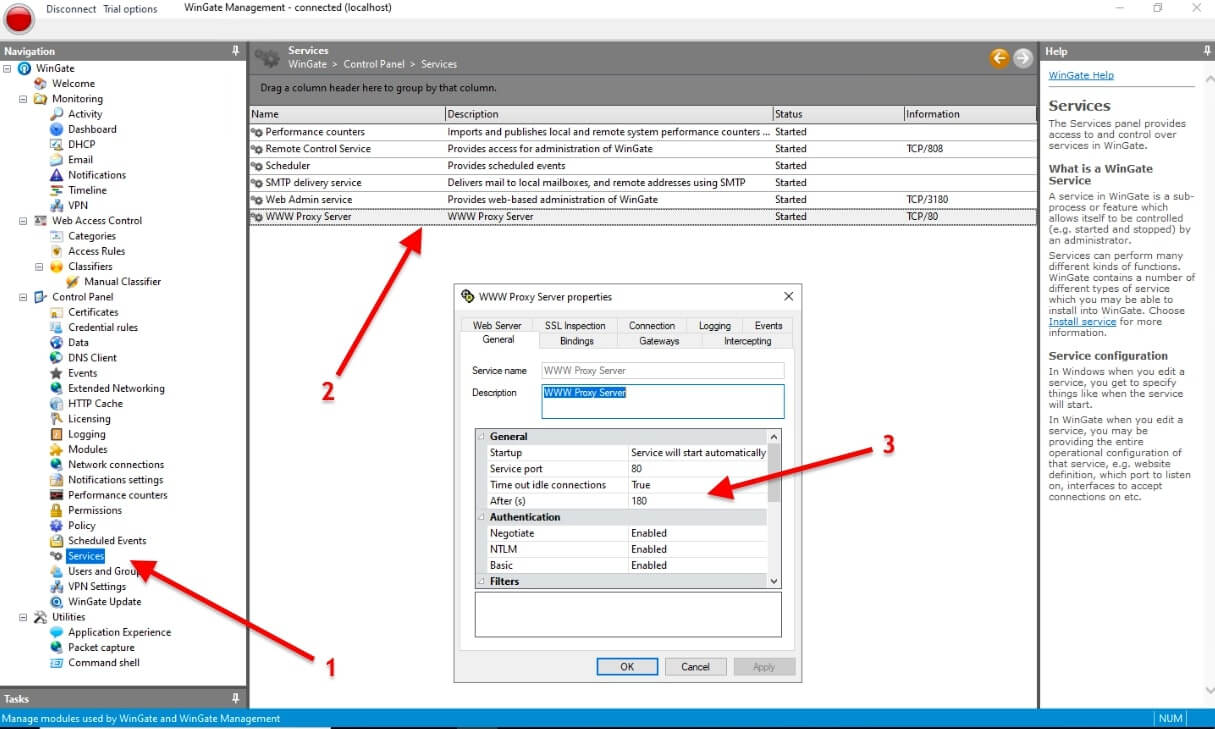
Enable Proxy Services
- In WinGate Management, go ahead and enable the necessary proxy services.
- Go to Control Panel > ‘Services’ (1) > Choose the appropriate Service (2) (in this case, WWW Proxy Server) > and start the proxy service (3).
Create Policies
Define user and group policies that specify what internet resources can be accessed, at what times, and with what bandwidth restrictions.
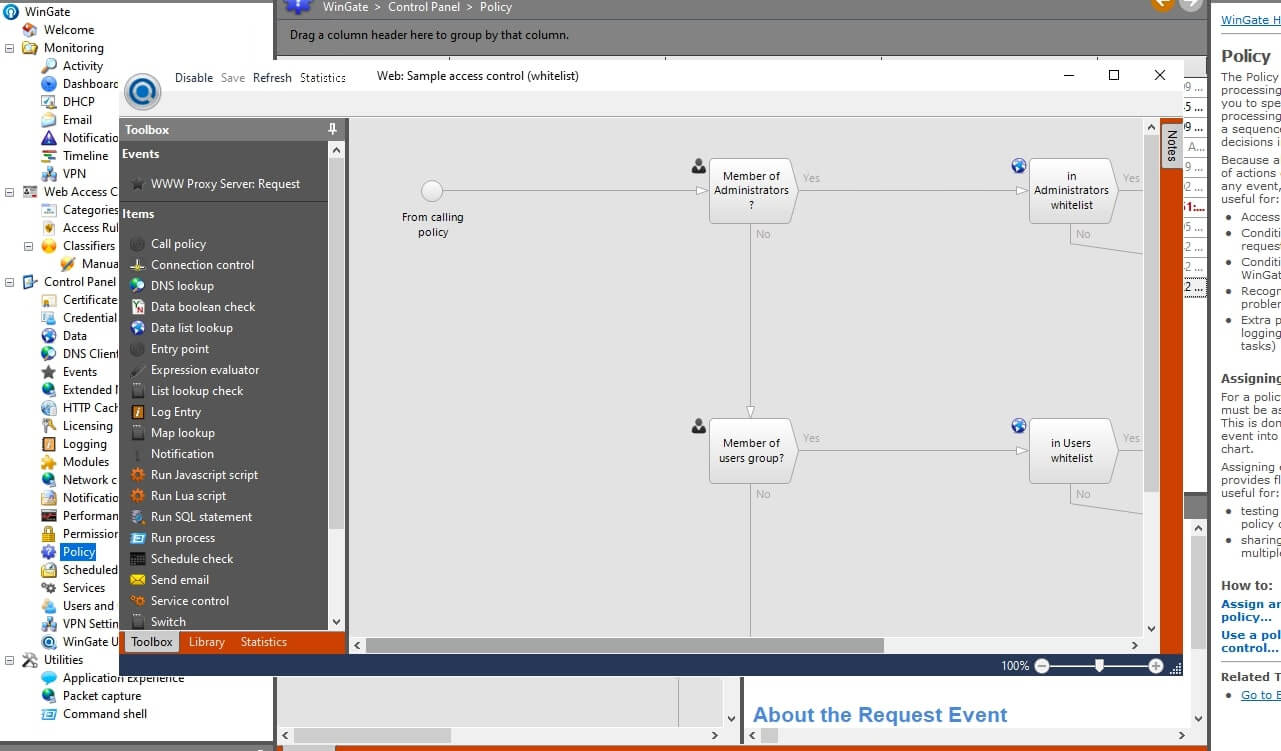
- This can be done under the ‘Policy’ section. Go to Control Panel > Policy (1) > Select the Policy that you would want to edit.
- For example, double-click on any current Policy, to edit it and assign it (2).
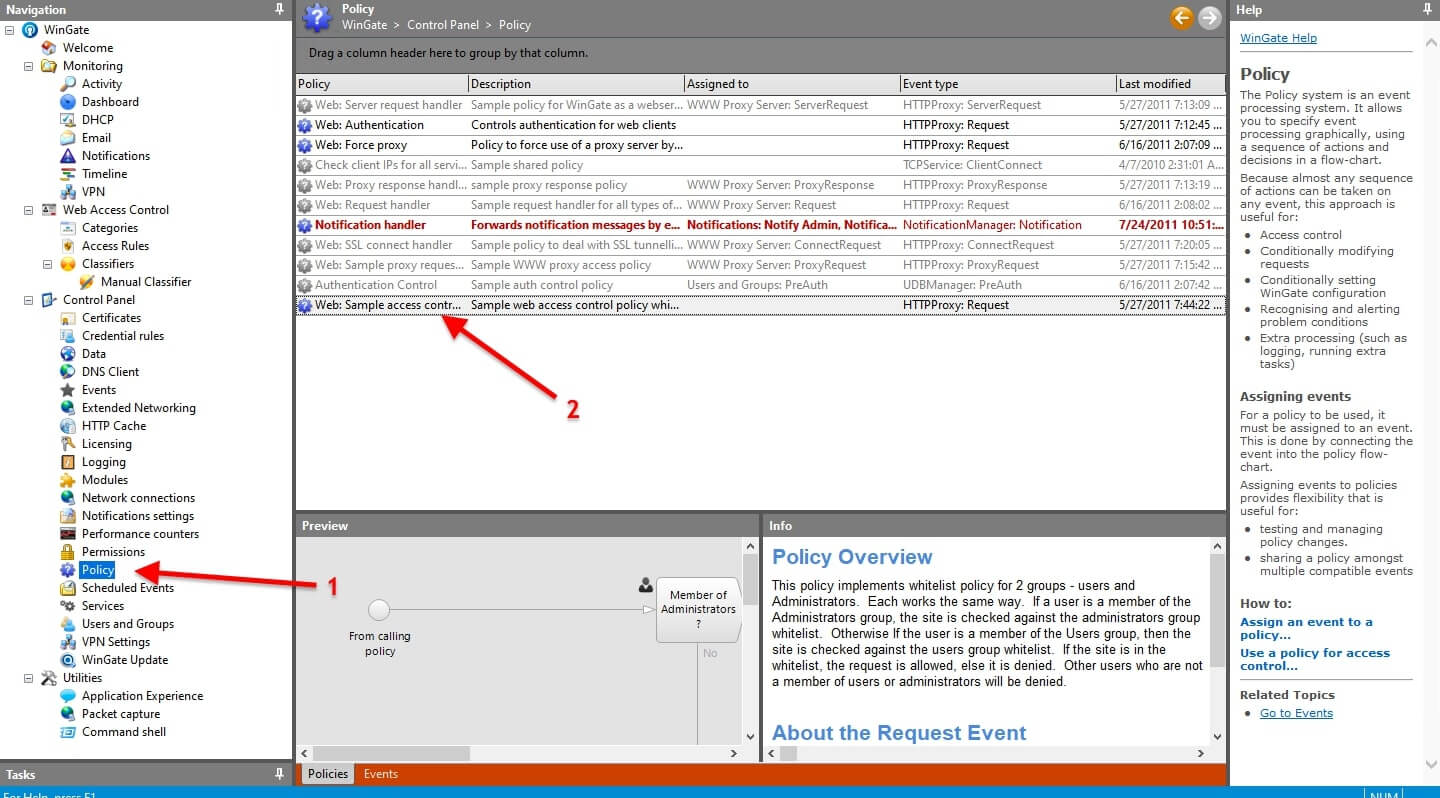
- The toolbox will open, where you will be able to dynamically edit policies: The WinGate Policy Editor’s Toolbox is where you will be able to create policy steps for flowcharts, triggered by specific events. It includes various policy items tailored to the event type and installed WinGate modules, allowing for actions or evaluations during policy processing. New items are added by dragging them to the worksheet and connecting them in sequence from the Event item for functional policy flowcharts.
Configure Clients
Configure the clients’ browsers or operating systems to use the WinGate server as their proxy server. This usually involves entering the IP address of the WinGate server and the port number for the proxy service.
Monitor and Control Traffic
Use WinGate’s monitoring tools to view real-time traffic and logs. Adjust policies and settings as needed based on this data.
Configuring WinGate’s Firewall and VPN:
To use WinGate as a VPN Server, you would typically install the software on a server connected to your network. Configure the network settings within WinGate for your specific setup, enabling the required VPN services. Clients would then configure their devices to use WinGate as their VPN server. The built-in firewall and security protocols like SSL and X.509 certificates help ensure a secure connection.
In addition, the WinGate VPN comes with a powerful firewall that can filter packets and protect ports. This feature allows you to configure both VPN and network security in great detail, ensuring that TCP/UDP packets are carefully examined before they can access the network.
Firewall basic parameters.
Let’s start by configuring the basic parameters of WinGate’s firewall functionality.
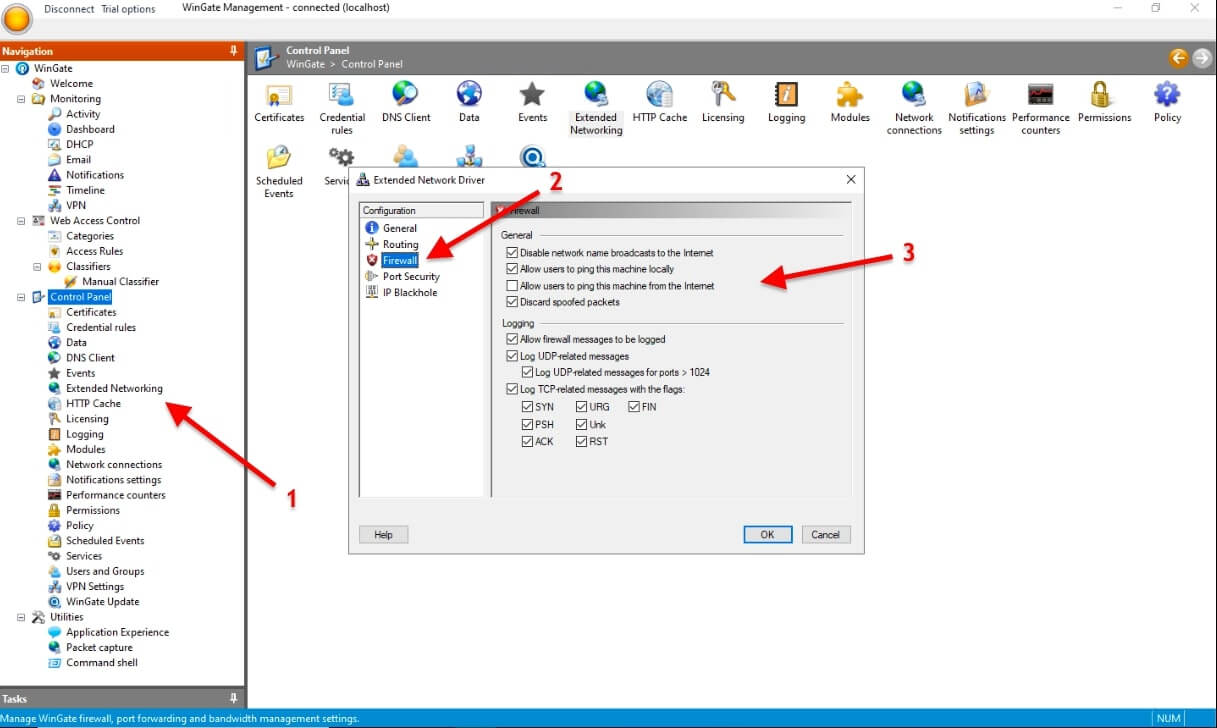
- Open the WinGate Management console and find the ‘Firewall’ section. The firewall settings are under Control Panel > Extended Networking (1) > Configuration > Firewall (2) > Firewall: General or Logging (3). Here you’ll find the global firewall configuration. Modify any parameters you see fit for your environment.
Access Rules
Set up specific firewall rules to regulate allowed and blocked traffic. You can customize these rules by specifying IP addresses, ports, protocols, and applications among other parameters.
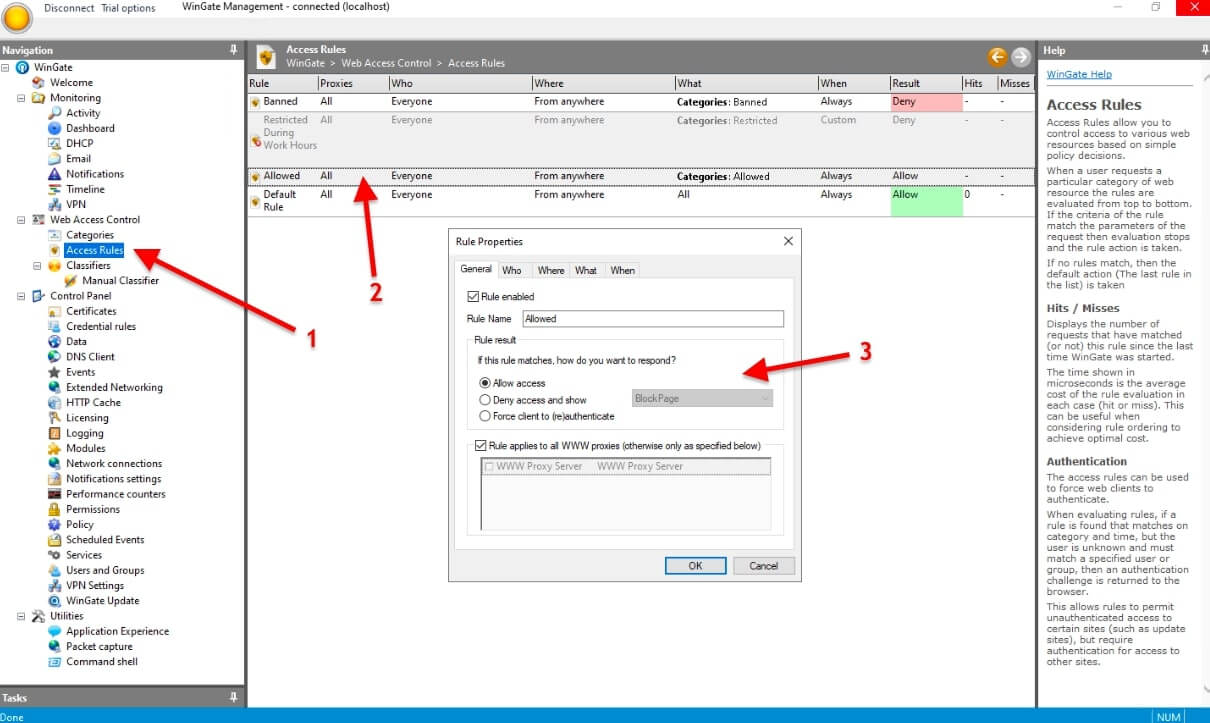
- Go to Web Access Control > Access Rules (1) > Select the rule you want to edit (2) > Change the rule properties (3) > Select either (Who, Where, What, When) to configure User/Group, IP ranges, timeframes, etc.
- Implement your rules and conduct tests to confirm they function as planned.
- You might need to try accessing certain services or ports externally to ensure the rules effectively permit or deny traffic.
- Keep an eye on the firewall activity logs to identify any illegal access attempts. Modify your firewall rules as needed to maintain security at its highest level.
WinGate’s VPN Settings.
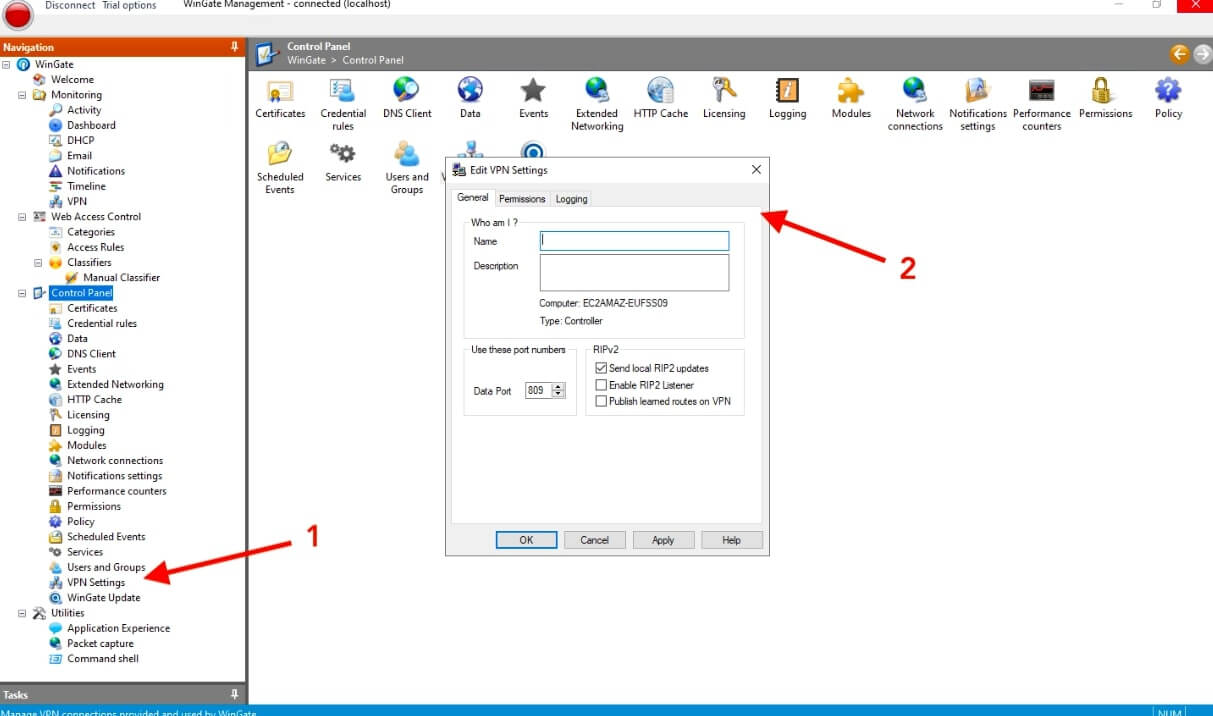
To configure VPN Settings, head over to VPN Settings (1) under Control Panel. On the General Tab, you will be able to configure the basic settings for the VPN server.
- You can give the VPN a name for identification and a description for administrative purposes.
- Set the port numbers that the VPN service will listen on for incoming connections. The default is usually port 809 for WinGate VPNs.
- If there are options to enable specific protocols like RIPv2 or security protocols, make sure they are selected according to your network requirements.
- After configuring, apply the settings and save the configuration.
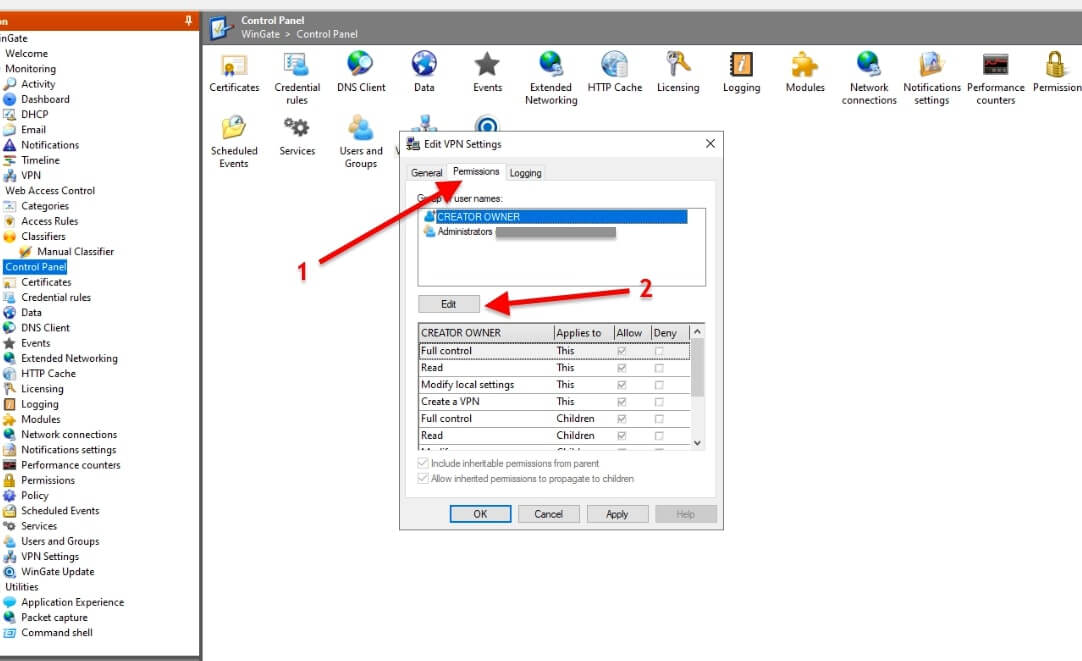
- Permissions Tab: This is the place where you can set who can access the VPN. You can define user and group settings here. Define who will have access by creating user accounts or groups in the the same Control Panel > VPN Settings, now click on the Permissions tab (1) > Users and Groups section and then Edit (2).
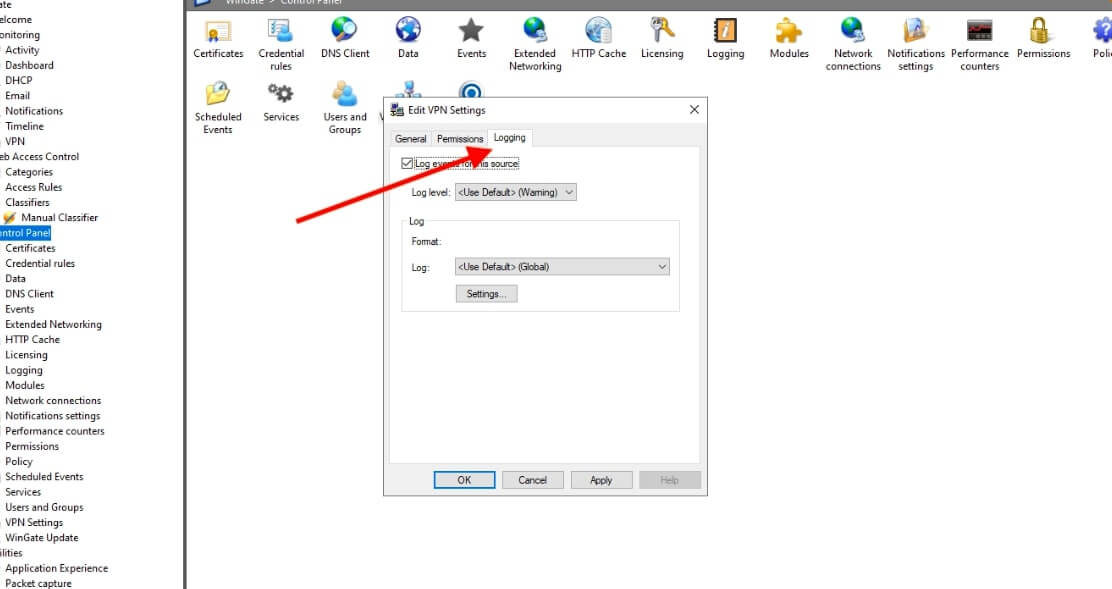
- Logging Tab: In this tab, you would configure what information about the VPN connections is logged. This includes log event and log format.
- Test the VPN Connection: Have a remote user test the connection to ensure they can access the internal network resources securely. Once configured, you can keep track of VPN on Monitoring > VPN.
5. FAQ: Understanding WinGate Proxy and Networking Features
What is the difference between Private Proxy Wingate.me and Wingate.com?
Wingate.me is a Russian service that offers proxy services with HTTP and SOCKS5 proxies for secure and anonymous internet access. It features a large, regularly updated IP pool and simple, immediate access upon purchase, along with a free trial and an affiliate program. On the other hand, Wingate.com (WinGate) provides a comprehensive suite for businesses, including a multi-protocol proxy server, email server, internet gateway, VPN, and network administration tools. It caters to advanced control and security needs of organizations.
How does WinGate utilize IPv6 for enhanced performance?
WinGate leverages IPv6 to provide a larger address space, reducing the need for NAT (IPv6 does not need NAT) and improving routing efficiency. This can lead to enhanced performance, particularly for complex networks with many devices, by simplifying network configuration and allowing for direct addressing.
SOCKS5 vs HTTP Proxies in WinGate: Which should I use?
SOCKS5 proxies, being lower-level, support a wider range of traffic and more authentication methods, making them a good choice for activities like streaming or P2P file sharing. On the other hand, HTTP proxies are application-level proxies best suited for web browsing and accessing geo-blocked content. The best choice for you will depend on your specific needs for security, performance, and anonymity.
What are private proxies with WinGate?
With WinGate, you can use private proxies to be assigned to one user only. This means users can get a private IP address that isn’t shared with anyone else. This is more secure, and reliable and gives users more control over how the proxy is used. It’s perfect for sensitive tasks like secure browsing or managing confidential business processes. Bear in mind that WinGate is just software, to extend its functionality you can use private or shared proxies (IP addresses) from a provider.
Can I use WinGate for web scraping?
Yes, you can use WinGate for web scraping as it can handle multiple proxy types and manage numerous simultaneous connections, which is essential for efficient web scraping. However, it’s important to comply with the target website’s terms of service and scraping policies to avoid any legal issues. To learn more about this, check our complete guide to web scraping.
How to make a proxy using wingate?
To set up a proxy with WinGate, you need to install the software on a server and configure the proxy settings in the WinGate Management console to handle internet requests from client machines. Learn more about this process in our “How to set up wingate for proxy service”.
What risks does wingate proxy server mitigate?
The Wingate proxy server can help protect your company from unauthorized access, internet threats like malware, and ensure that employees are following your internet usage policies. It does this by filtering traffic and protecting client machines from various security threats.
6. Final Words.
WinGate is a powerful all-in-one network management solution that can handle both security and connectivity.
We hope this guide helped you get started with WinGate. This tool is perfect if you are either managing an enterprise network or just setting up your home network. With it, you can have a secure, efficient, and reliable network experience.
Please leave your comments and suggestions about Wingate below.
Improve WinGate’s experience with RapidSeedbox’s proxy services.
Benefit from high-speed, secure, and anonymous IPv4 and IPv6 proxies, ideal for activities like SEO optimization, web scraping, and market research. Also, enjoy 24/7 support and a 24-hour money-back guarantee.
0Comments